HOWTO: Easy install a Linux Virtual Delivery Agent
With the availability of Citrix XenDesktop 7.12 comes the “Easy install” feature for installing the Linux Virtual Delivery Agent (VDA). Previously, a lot of manual steps were involved for installing and configuring the prerequisites for the Linux VDA. This has now become a lot easier with “Easy install”. During my tests with “Easy install”, I ran into an issue regarding domain lookup failure. The steps for fixing this issue are provided in this “HOWTO”.
For this “HOWTO” I use Ubuntu 16.04.1, which is supported with the release of Citrix XenDesktop 7.12. This “HOWTO” assumes you already installed Ubuntu. I used a “next-next-finish” install for this.
The Linux Virtual Delivery Agent 7.12 can be downloaded from the MyCitrix site (login required).
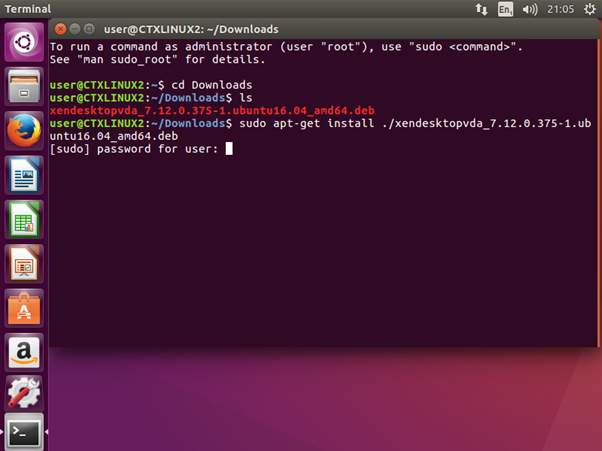
Start a terminal, go into the folder where the Linux VDA resides and install the Linux VDA by executing the following command.
|
1 |
sudo apt-get install ./xendesktopvda_[version].[platform].deb |
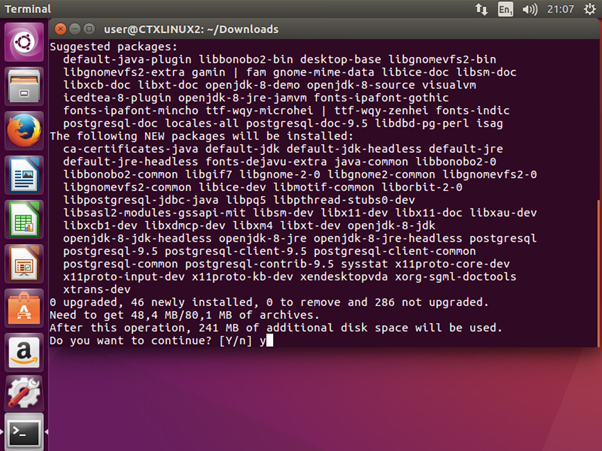
Press [y] and hit [enter].

Once it says “done.”, the Linux VDA is installed.
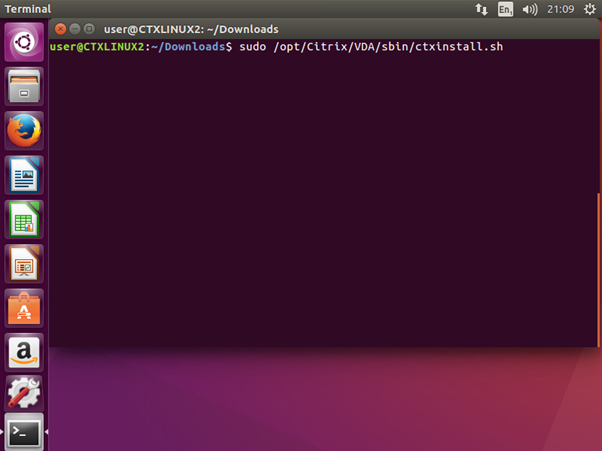
To configure the Linux VDA, enter the following command.
|
1 |
sudo /opt/Citrix/VDA/sbin/ctxinstall.sh |
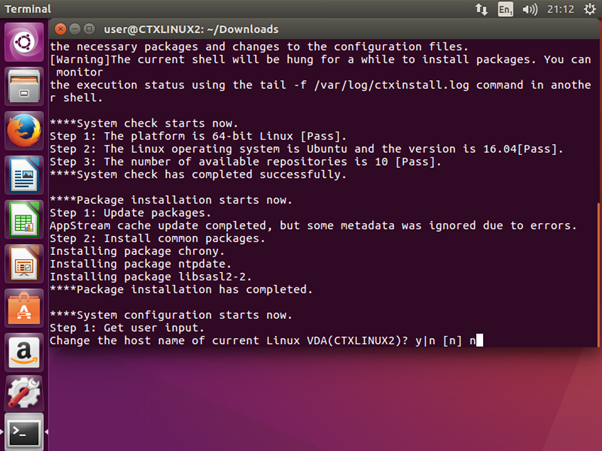
Since I already configured the host name properly, I pressed [n] and hit [enter].
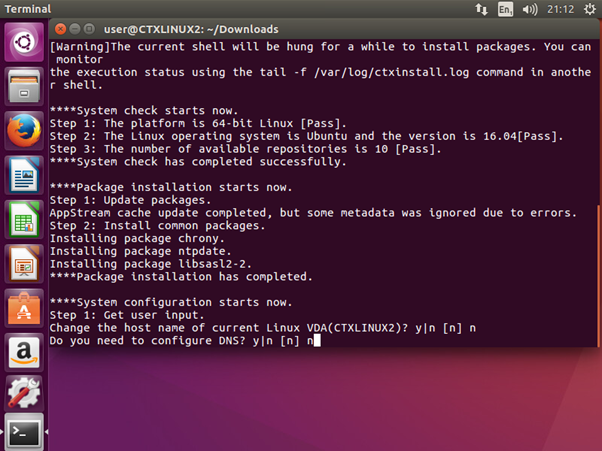
Since I receive the proper DNS settings from my DHCP server, I pressed [n] and hit [enter].
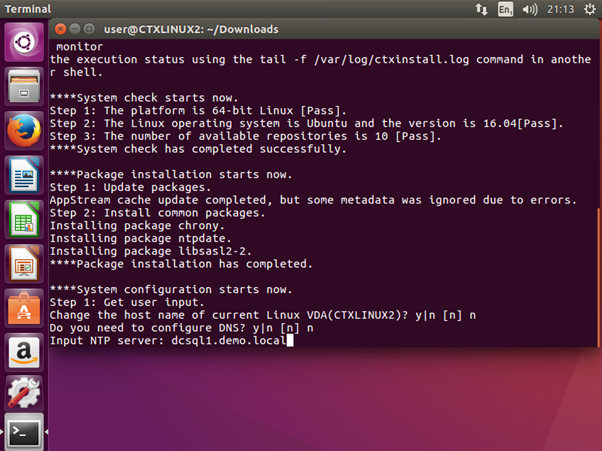
Enter the NTP server you want to use and hit [enter]. I used the domain controller in my demo environment.
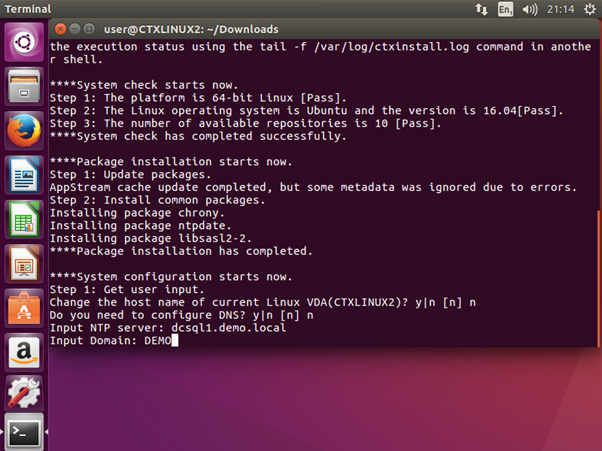
Enter the NetBIOS name for the Active Directory domain and hit [enter].
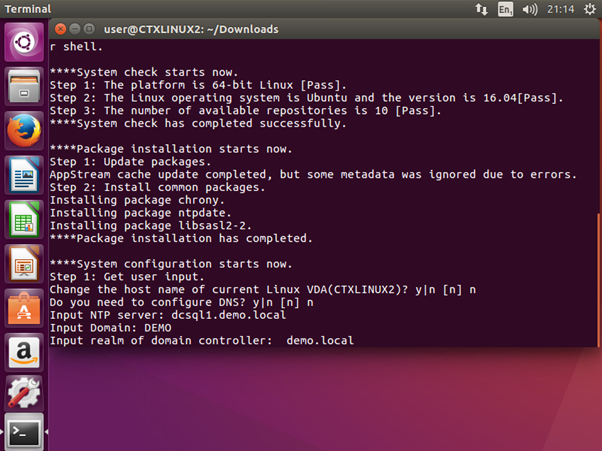
Enter the fully qualified domain name for the Active Directory domain and hit [enter].
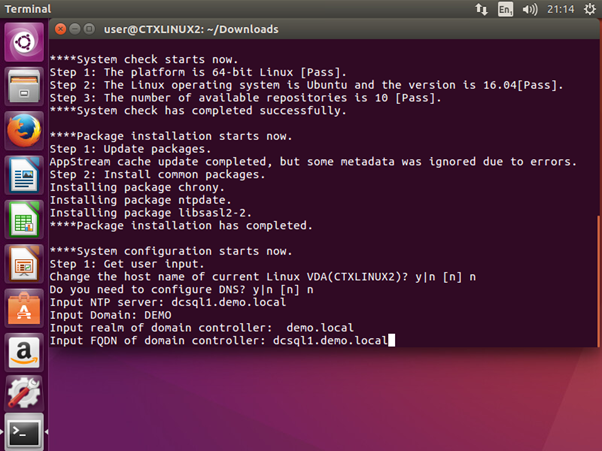
Enter the fully qualified domain name for the domain controller and hit [enter].
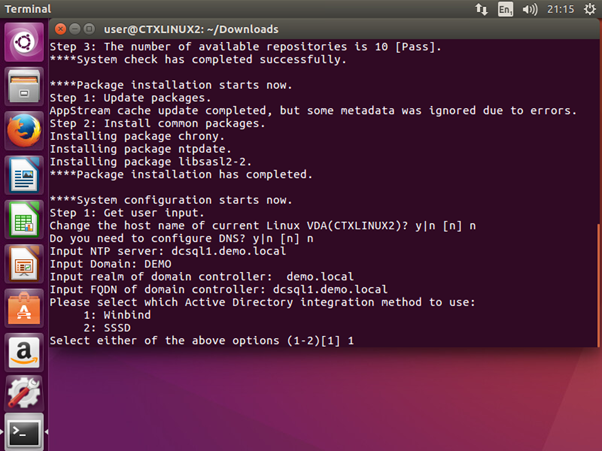
Choose the Active Directory integration method by pressing [1] or [2] and hit [enter]. I used the default (Winbind).
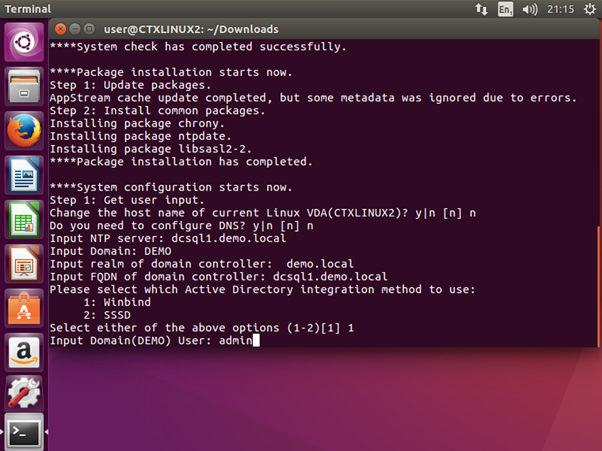
Type the name for the Active Directory account that is able to join the host to the domain and hit [enter].
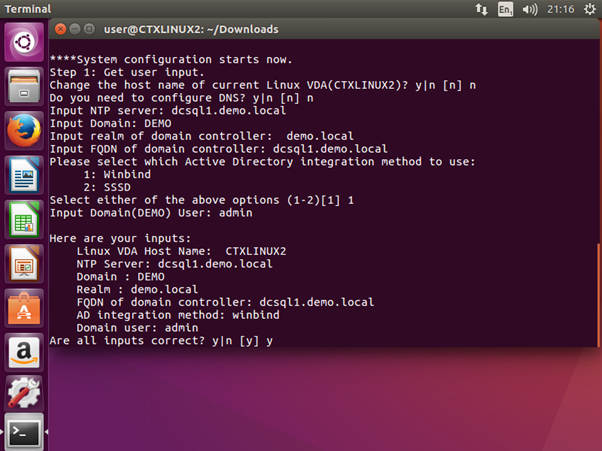
Check the inputs and press [y] and hit [enter] to confirm.
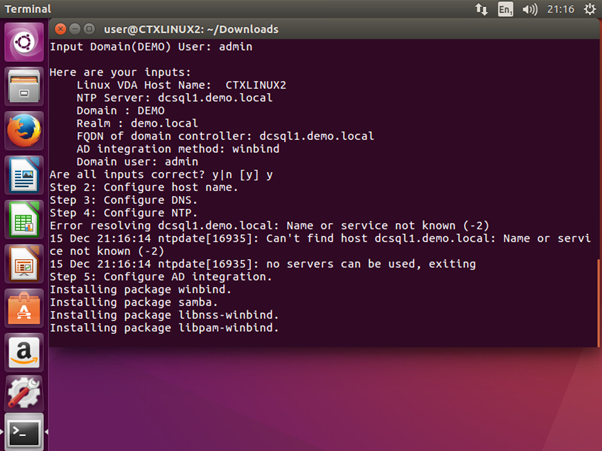
All necessary packages are installed and configured.
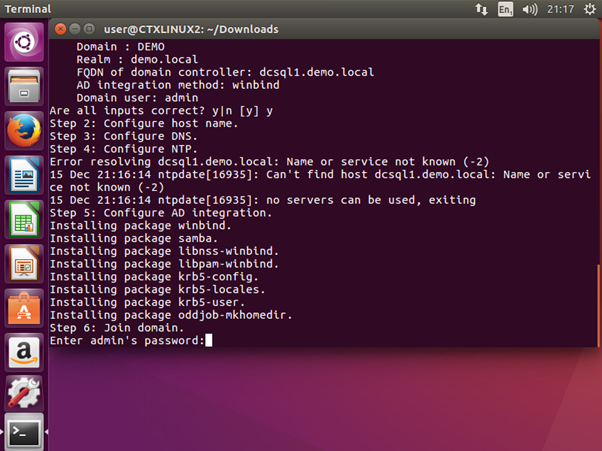
Enter the password for the account that will join the host to the domain and hit [enter].
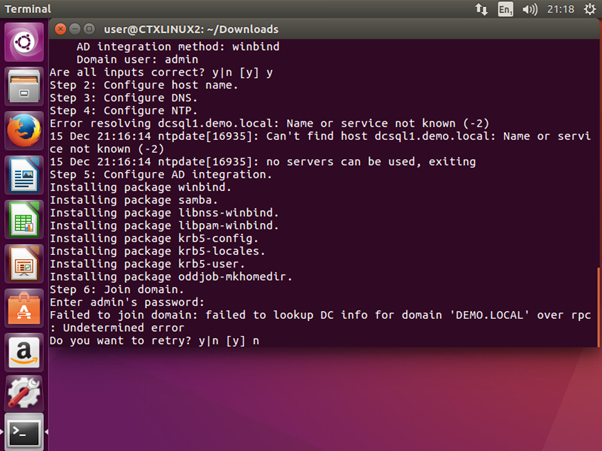
This is the step where I received the issue with domain lookup failure. Press [n] and hit [enter].
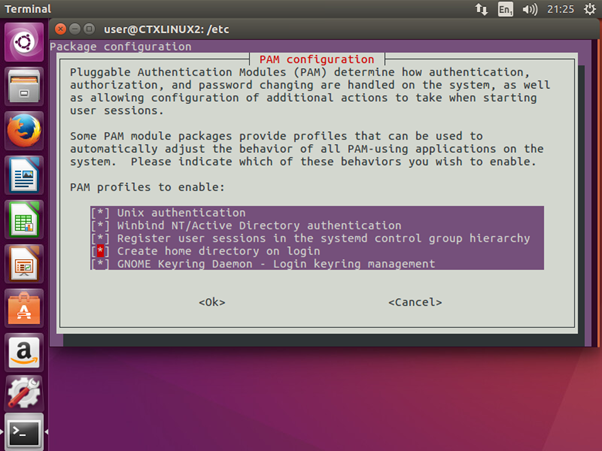
The PAM configuration window will appear. Select/Enable “Create home directory on login” to prevent issues for users not being able to login due to missing home directories. Use the [tab] key to select [Ok] and hit [enter].
The following steps will fix the issue with domain lookup failure.
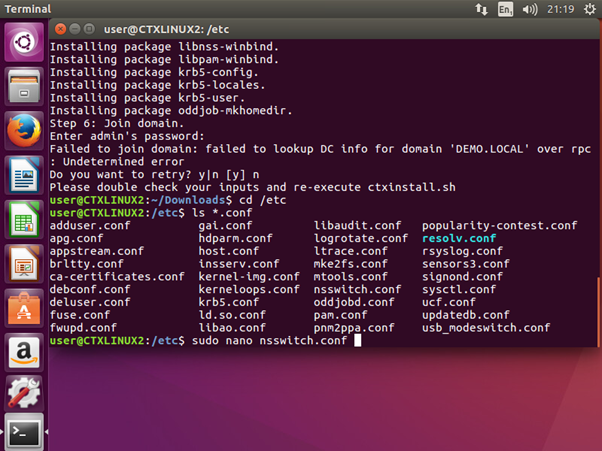
Go to the folder “/etc” and enter the following command.
|
1 |
sudo nano nsswitch.conf |
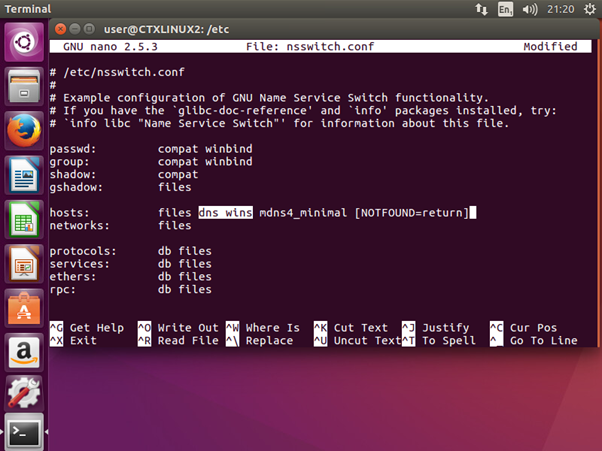
Look for the line that starts with “hosts:” and make sure that “dns” and “wins” are added after “files” and before “mdns4_minimal”. Press [control]-[x], [y], [enter] to save the file.
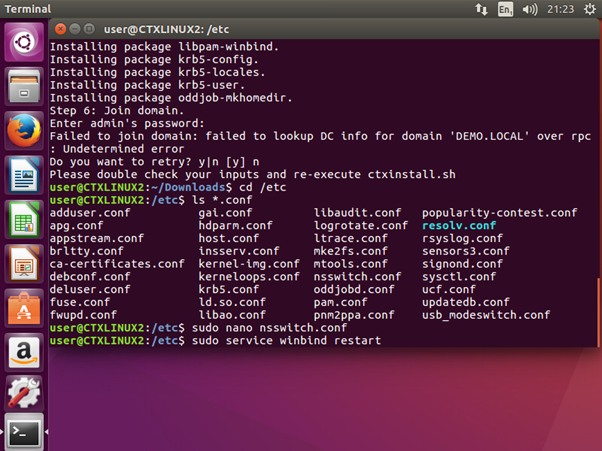
Type the following command to restart the winbind service.
|
1 |
sudo service winbind restart |
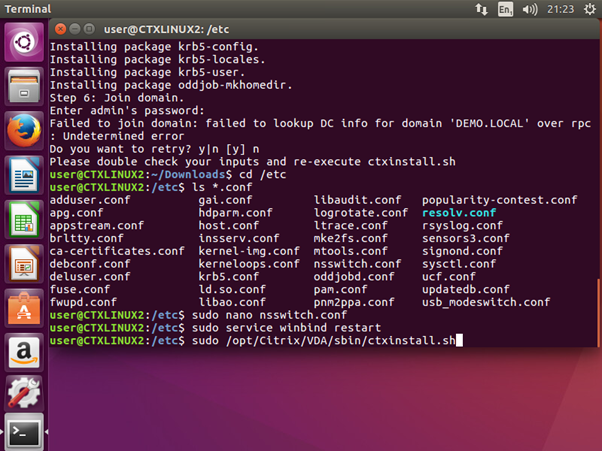
Re-execute the following command.
|
1 |
sudo /opt/Citrix/VDA/sbin/ctxinstall.sh |
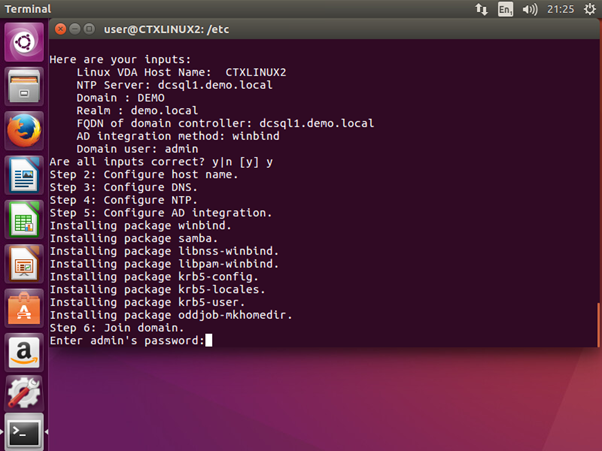
Go through the previous steps to configure the Linux VDA and enter the password for the account that will join the host to the Active Directory domain.

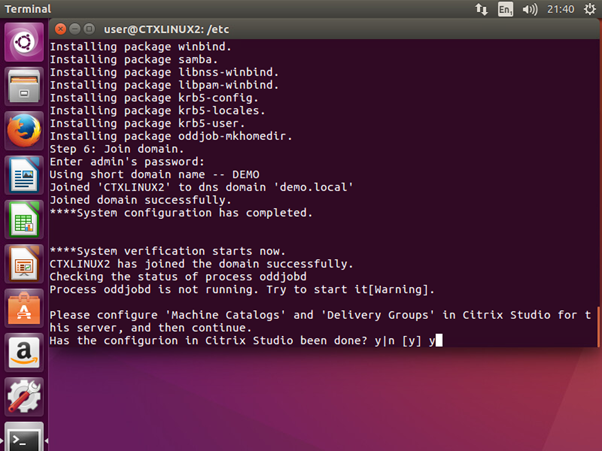
When the host has successfully joined the Active Directory domain, a message will appear that says “Joined domain successfully.”.
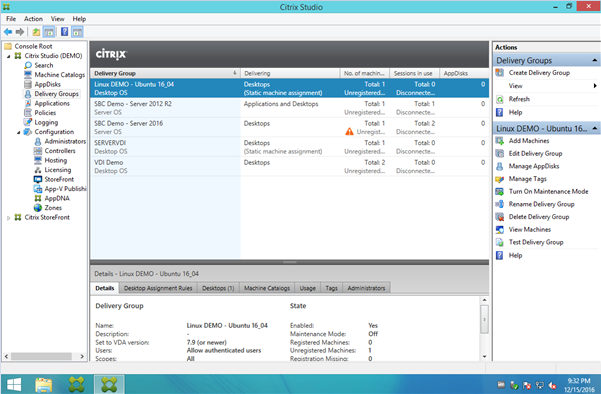
After this, the installer asks if the configuration in Citrix Studio for the “Machine Catalogs” and “Delivery Groups” has already been done. Proceed with the following steps in Citrix Studio.
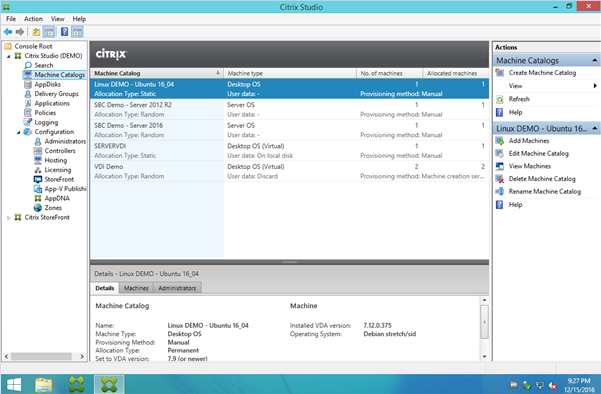
Click “Create Machine Catalog”.
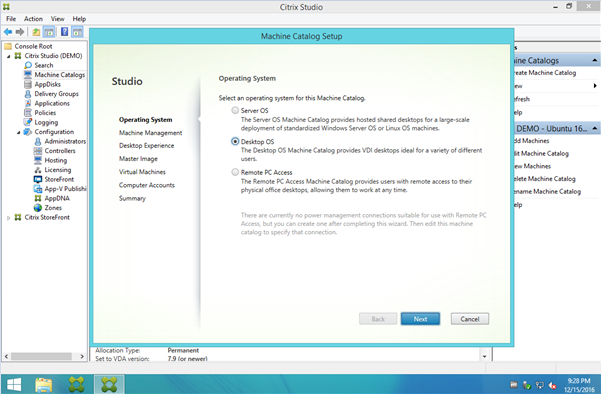
Select “Desktop OS” and click “Next”.
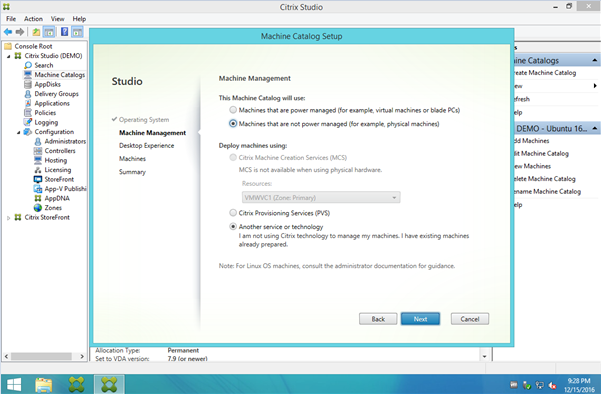
Select “Machines that are not power managed” (in my case) and select “Another service or technology” (in my case) and click “Next”.
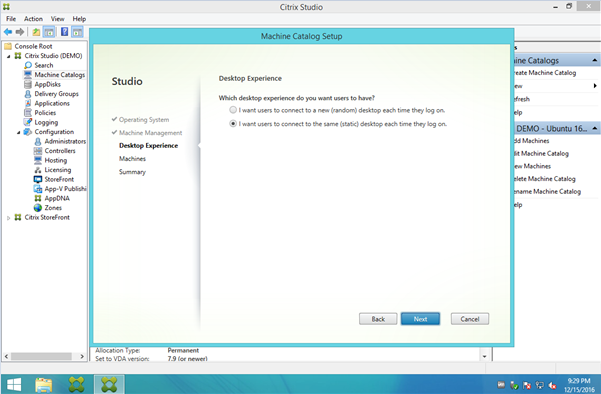
Select “I want users to connect to the same (static) desktop each time they log on.” (in my case) and click “Next”.
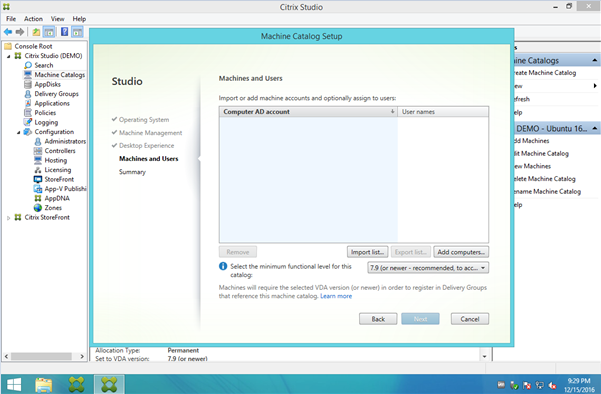
Click “Add computers…”.

Type the name for Linux host and click “OK”.
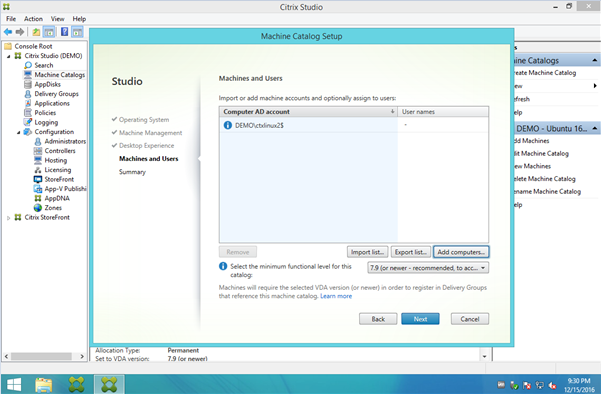
Click the dash “-“ in the column “User names”.
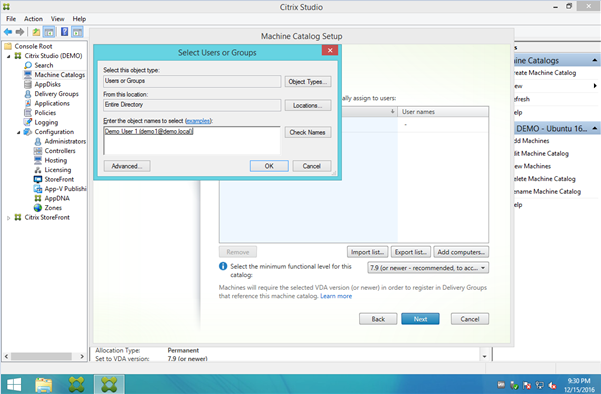
Enter the user name to which you want to assign the Linux host (in my case) and click “OK”.
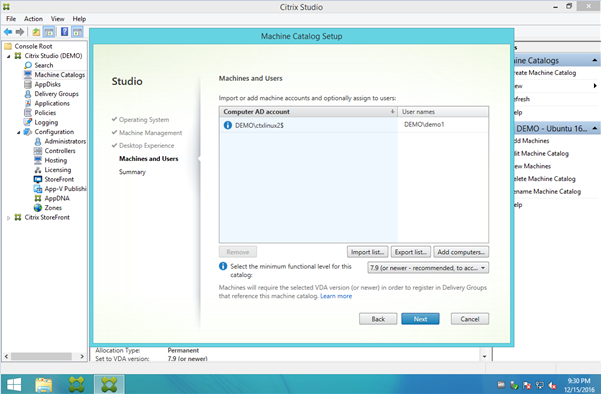
Click “Next”.
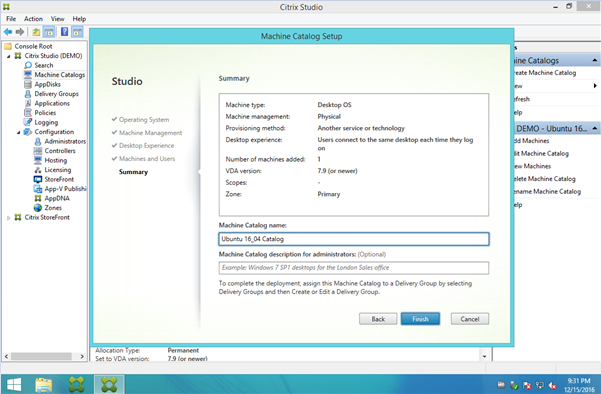
Enter a name for the Machine Catalog and click “Finish”.
Click “Delivery Groups” and click “Create Delivery Group”.
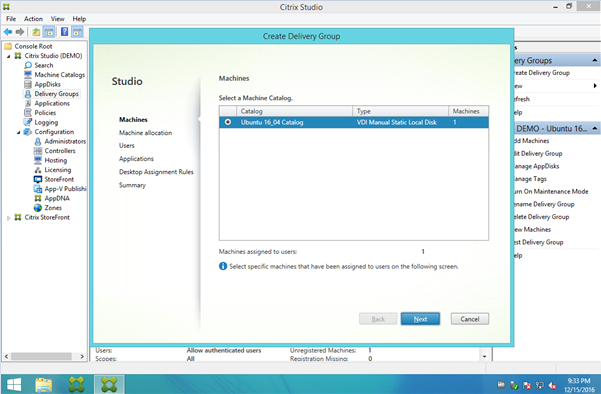
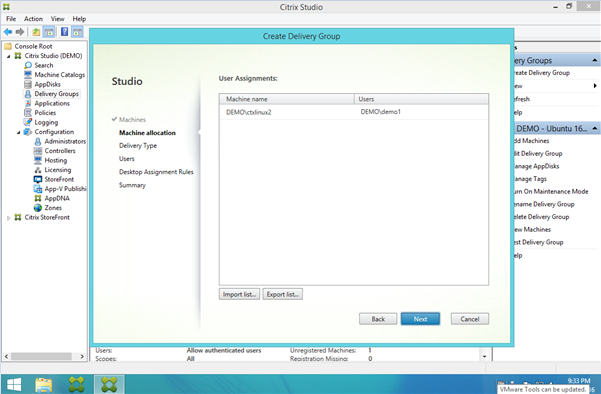
Select the machine from the Machine Catalog and click “Next”.
Click “Next”.
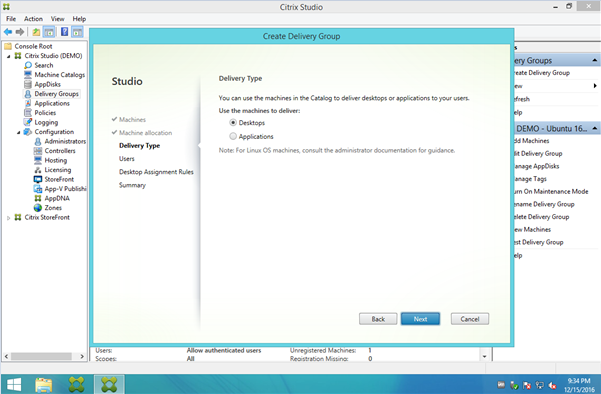
Select “Desktops” and click “Next”.
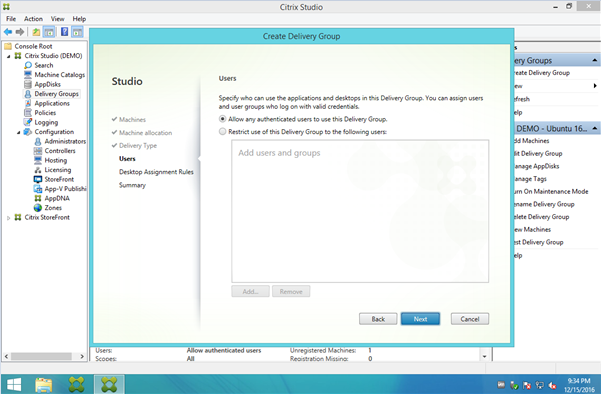
Select “Allow any authenticated users to use this Delivery Group” (in my case) and click “Next”.
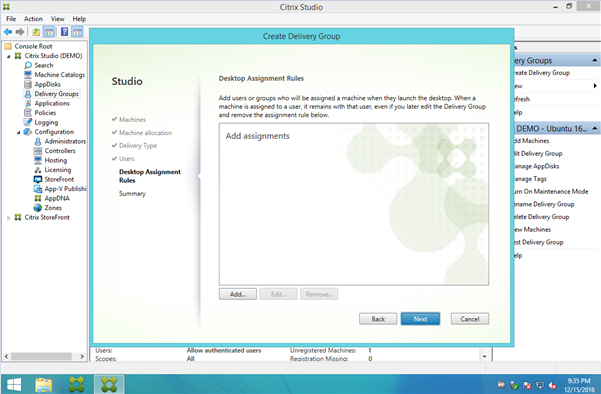
Click “Add”.
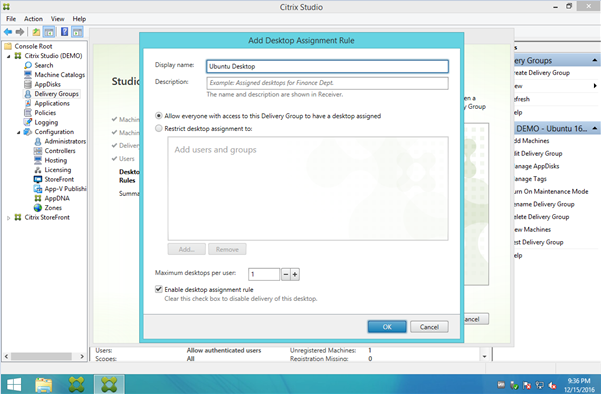
Enter a “Display name” and click “OK”.
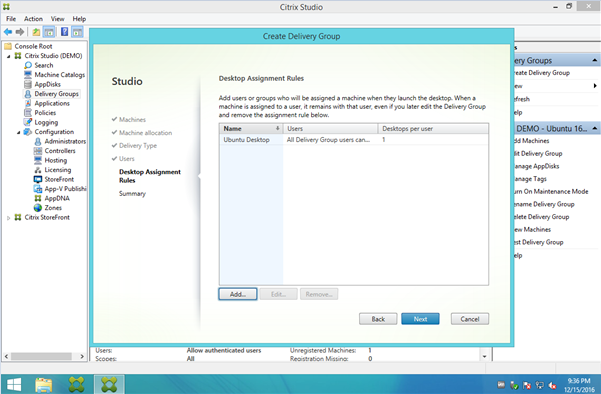
Click “Next”.
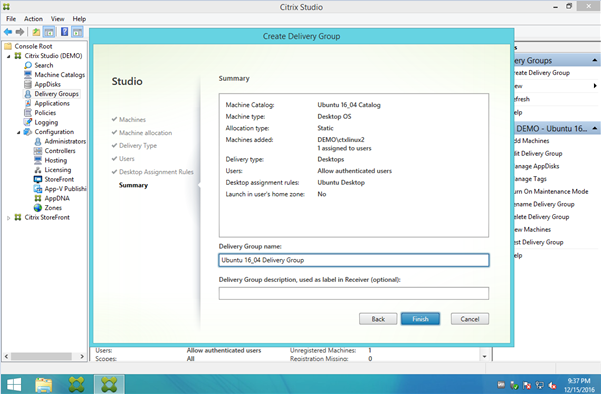
Enter a “Delivery Group name” and click “Finish”.
Return to the Linux host and press [y] and hit [enter].
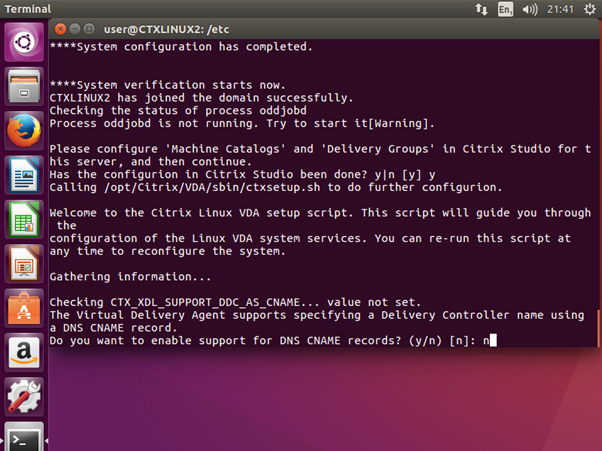
I don’t want to use support for DNS CNAME records, so I press [n] and hit [enter].
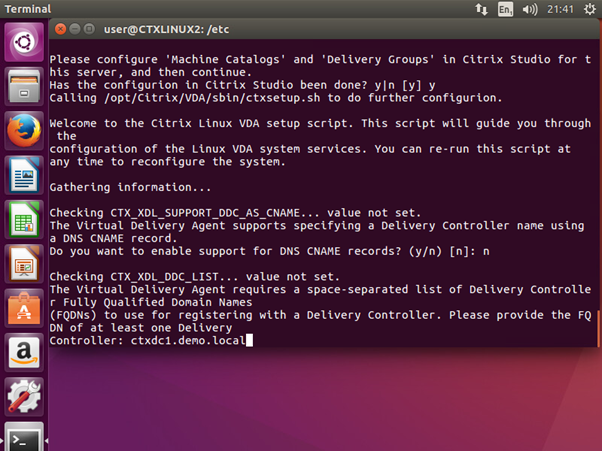
Enter the fully qualified domain name for the Citrix Delivery Controller and hit [enter].
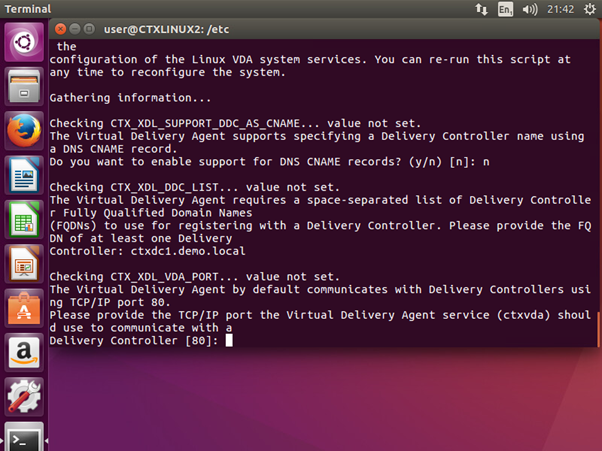
Hit [enter] to use the default port (80).
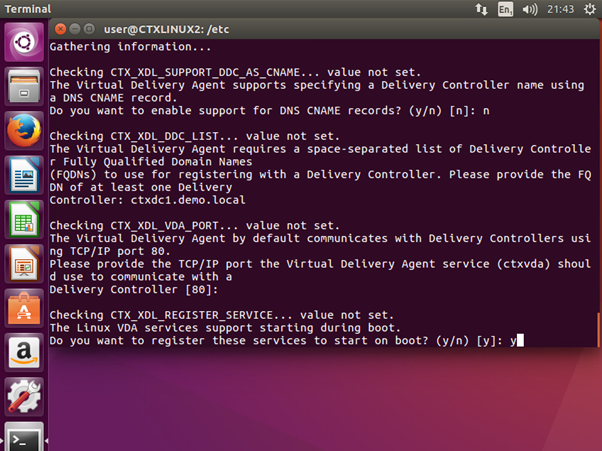
Press [y] and hit [enter] to start the Linux VDA services on boot.
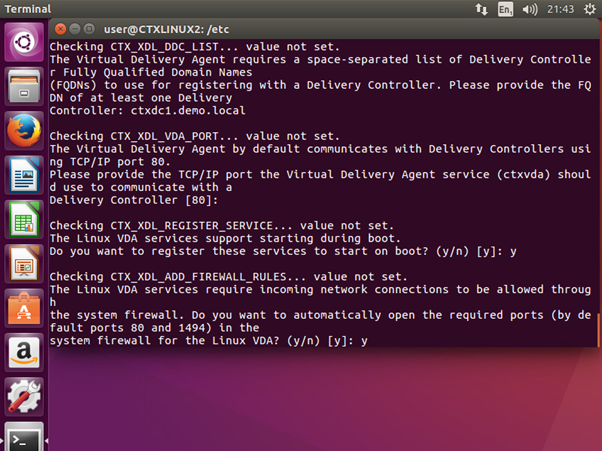
Press [y] and hit [enter] to automatically open up the required ports in the system firewall.
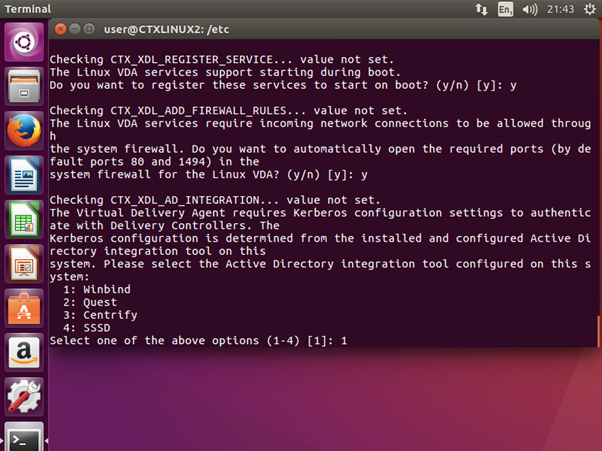
I chose the default (Winbind), therefore I pressed [1] and hit [enter].
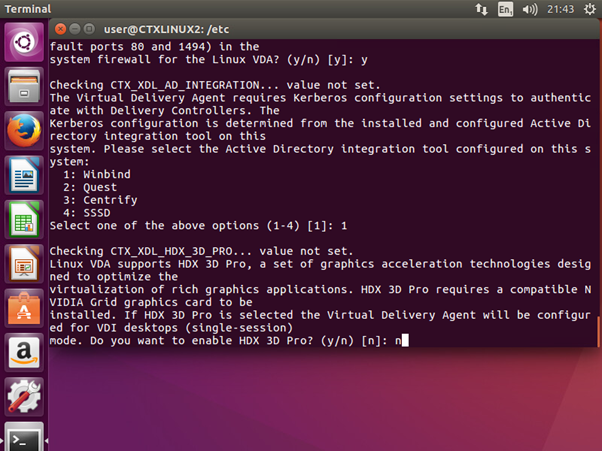
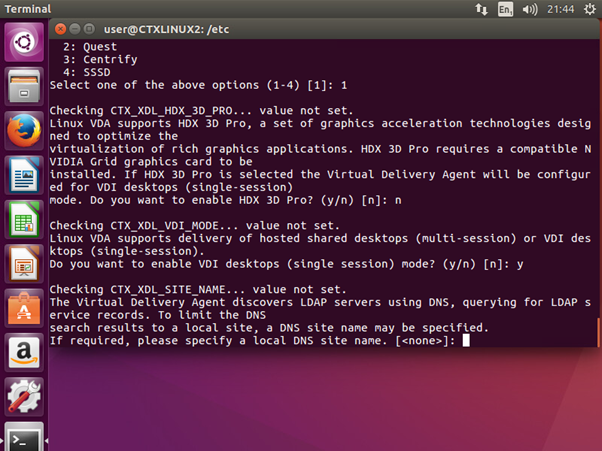
I don’t want to use HDX 3D Pro, therefore I pressed [n] and hit [enter].
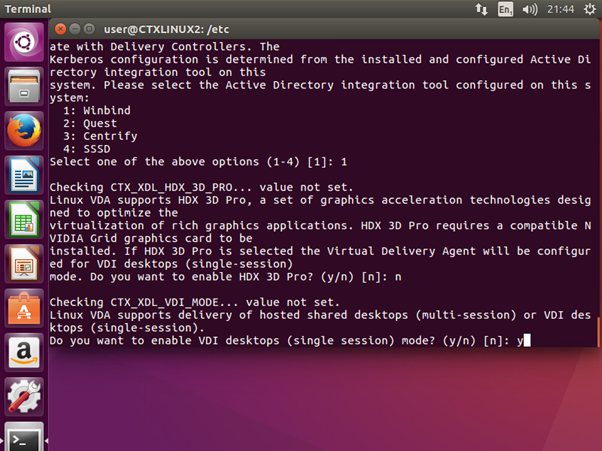
I want to enable VDI desktops in “single session” mode, therefore I pressed [y] and hit [enter].

For my environment, nothing “extra” is required, therefore I hit [enter].
For my environment, nothing “extra” is required, therefore I hit [enter].
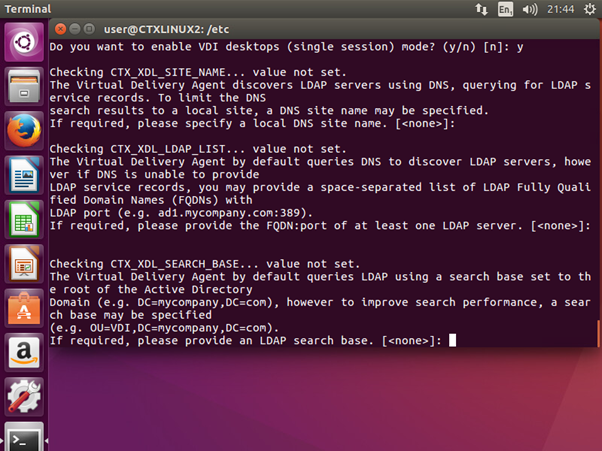
For my environment, nothing “extra” is required, therefore I hit [enter].
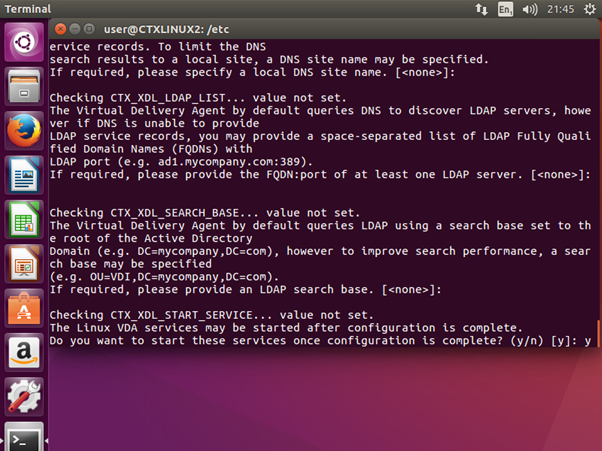
Press [y] and hit [enter] to start the Linux VDA services.
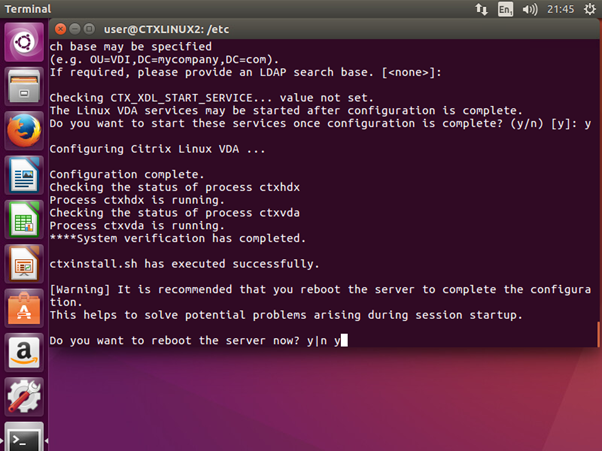
Press [y] and hit [enter] to reboot the Linux host.
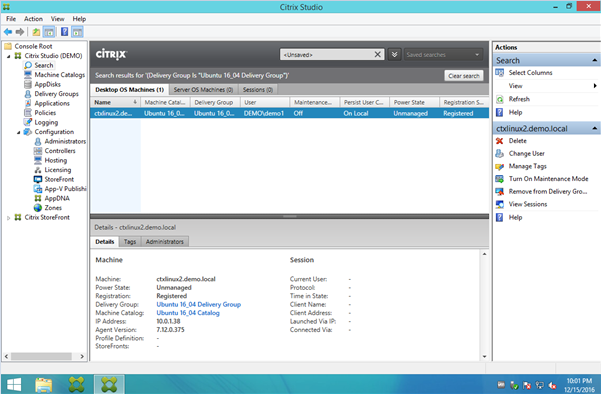
After the reboot the Linux desktop “should” appear as “registered” in Citrix Studio.
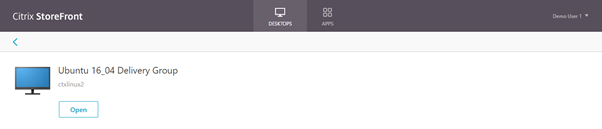
You should now be able to open the Linux desktop.