
Enabling SAML authentication for Horizon with Unified Access Gateway and Azure AD
This blog post describes the required steps for enabling SAML authentication for Horizon with Unified Access Gateway and Azure AD, including the configuration for integrating Horizon apps and desktops in existing (third-party) workspace portal solutions.
Shout-outs
Before I start, I want to give a huge shout-out to the following people for pointing me to useful articles, and giving input and contributing to the solutions described in this blog post.
For the largest part, this blog post is based on two great already existing articles.
- Enabling SAML 2.0 Authentication for Horizon with Unified Access Gateway and Okta: VMware Horizon Operational Tutorial, written by Andreano Lanusse, End-User-Computing Staff Architect, Technical Marketing at VMware.
- Integrating Microsoft Azure MFA with VMware Unified Access Gateway 3.8, written by Sean Massey, Staff Cloud Solutions Architect at VMware.
Credits go the authors of these articles.
Prerequisites
Before continuing, I assume you already have the following in place.
- A running Horizon environment, version 7.11 or higher
- A running True SSO configuration
- A running Unified Access Gateway, version 3.8 or higher
- A running Azure AD tenant
Enabling Azure AD Connect (sync)
Even though it is not strictly necessary to have Azure AD Connect in place for this solution, it may be easier to sync your on-prem AD identities with Azure AD from, for instance, an administrative perspective.
If you already have Azure AD Connect in place or don’t want to setup Azure AD Connect, you can skip this chapter.
If you want to setup Azure AD Connect, you can follow the steps from the link below.
Creating the Enterprise Application (Metadata)
First we need to create the metadata required for the integration between the Unified Access Gateway and Azure AD, and between Horizon and Azure AD. The latter is used when using True SSO for single sign-on in Horizon.
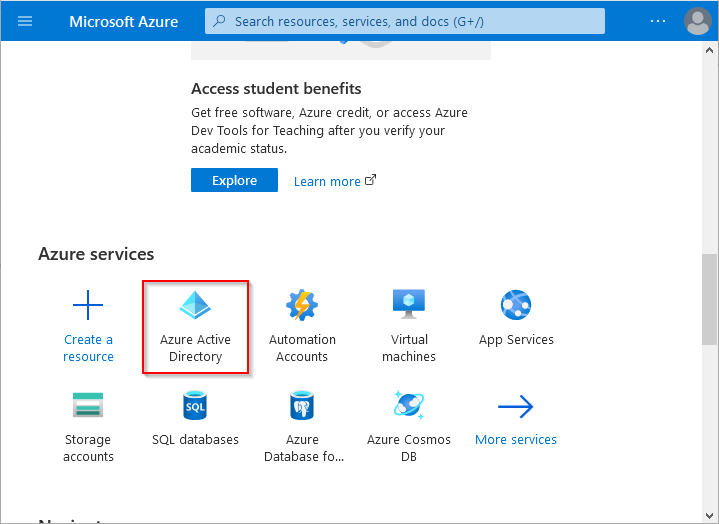
Go to the Azure AD portal and click on Azure Active Directory.
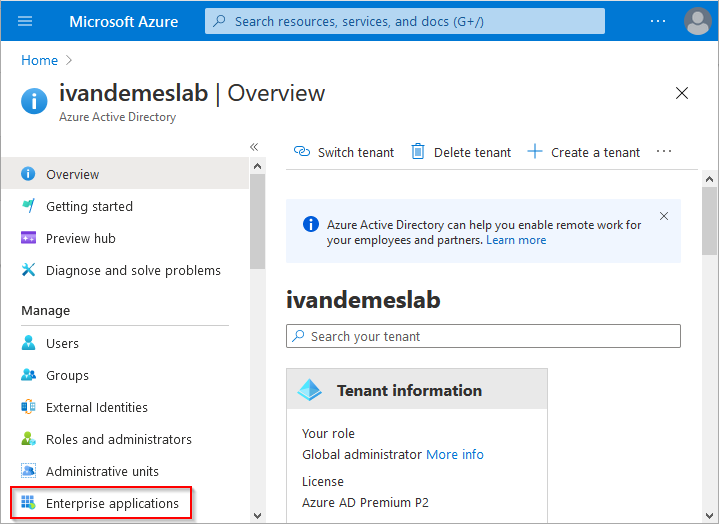
Click on Enterprise applications.
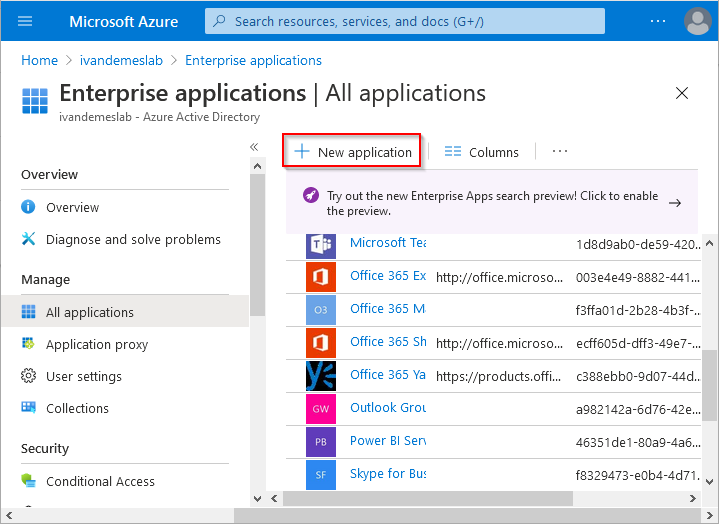
Click on New application.
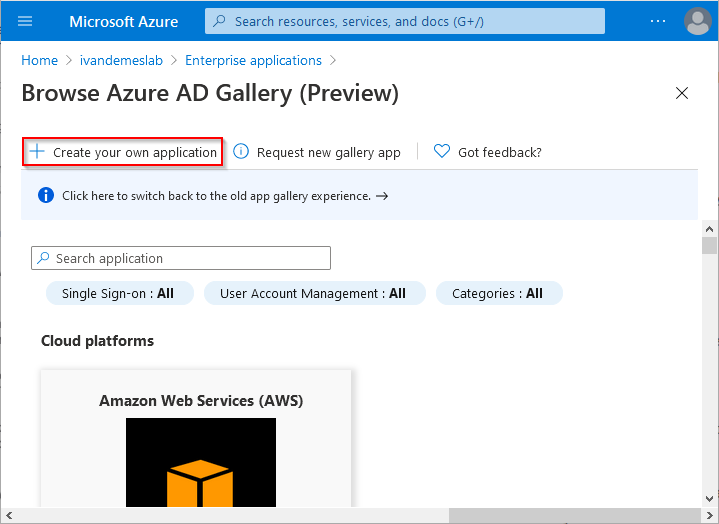
Click on Create your own application.
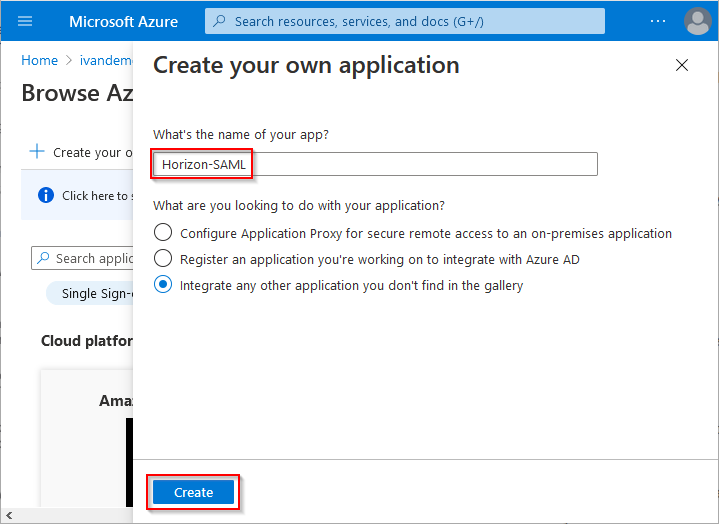
Give the application a name (from now on Horizon-SAML in this example) and click on Create.
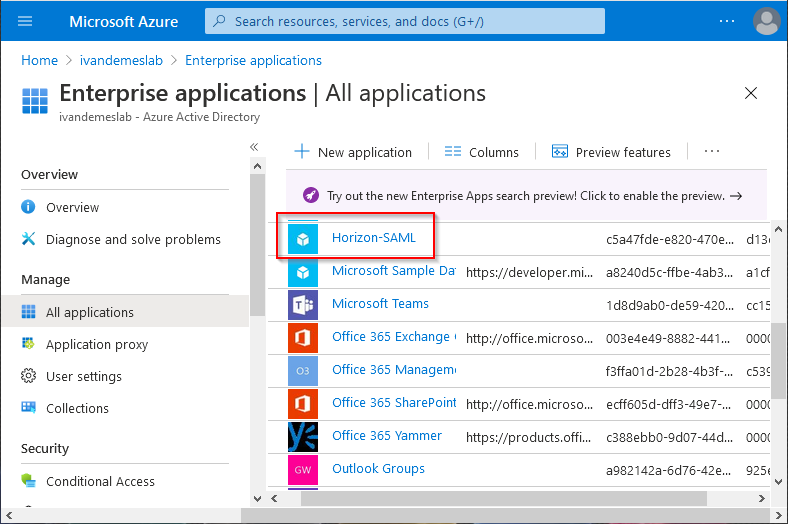
Click on Horizon-SAML.
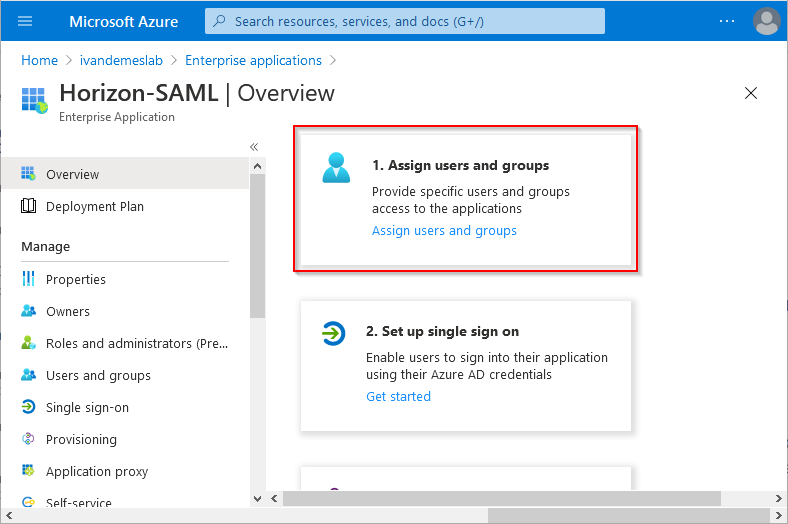
Click on (1. Assign users and Groups) Assign users and groups.
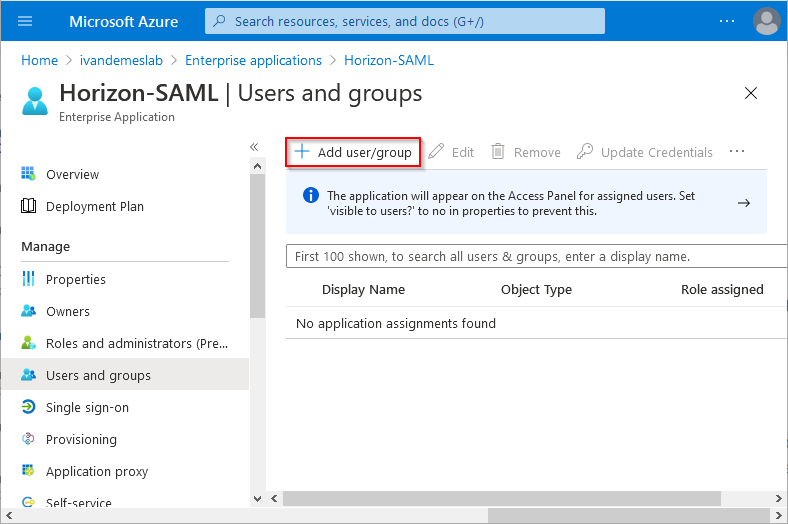
Click on Add user/group.
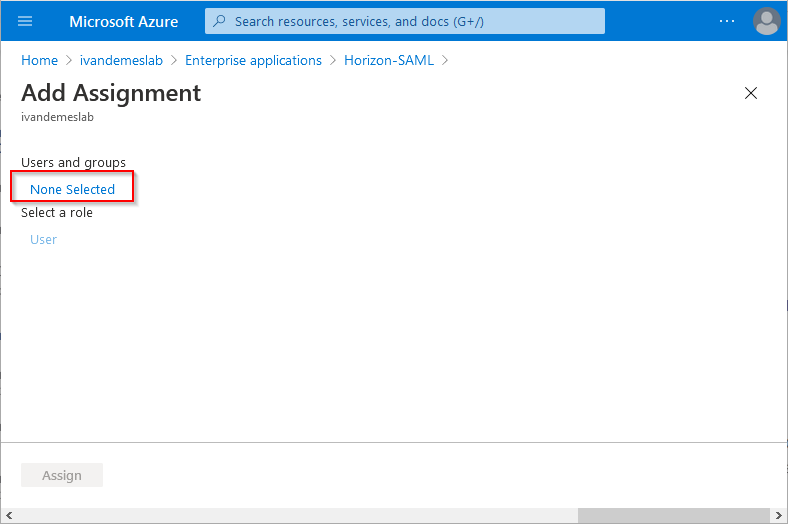
Click on None Selected.
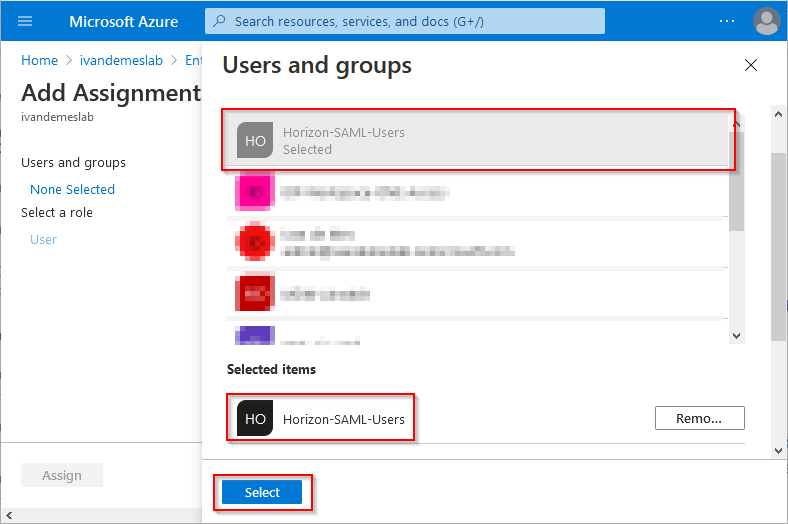
Select the Azure AD group or users you want to allow access for this application (the group Horizon-SAML-Users in this example), and click Select.
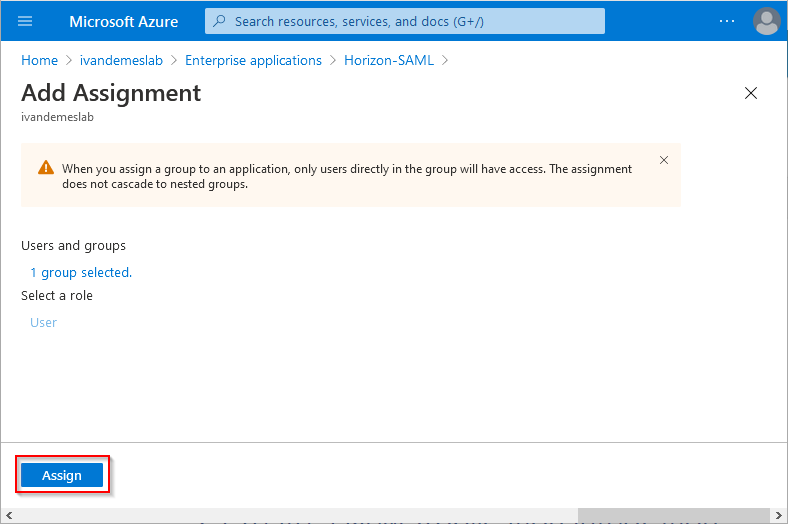
Click on Assign.
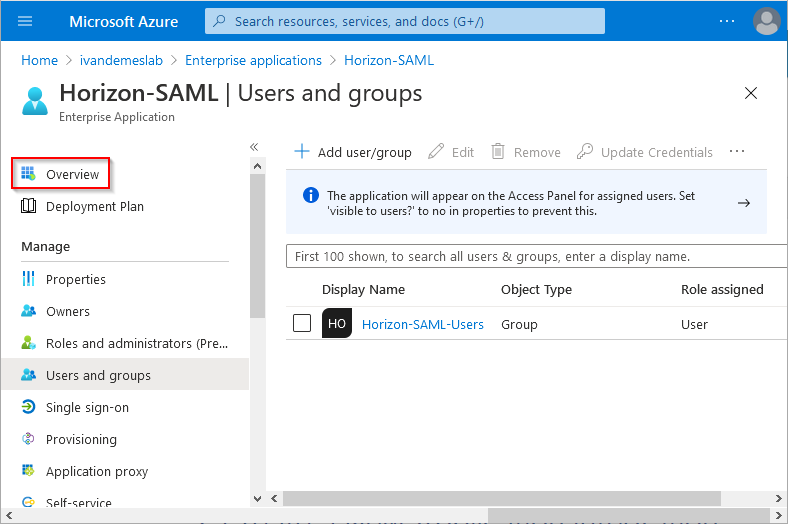
While still having the application (Horizon-SAML) open, click on Overview.
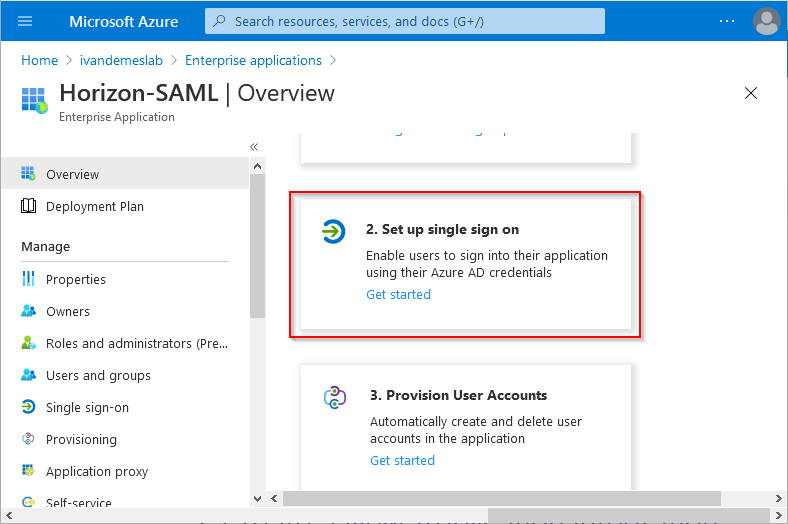
Click on (2. Set up single sign on) Get started.
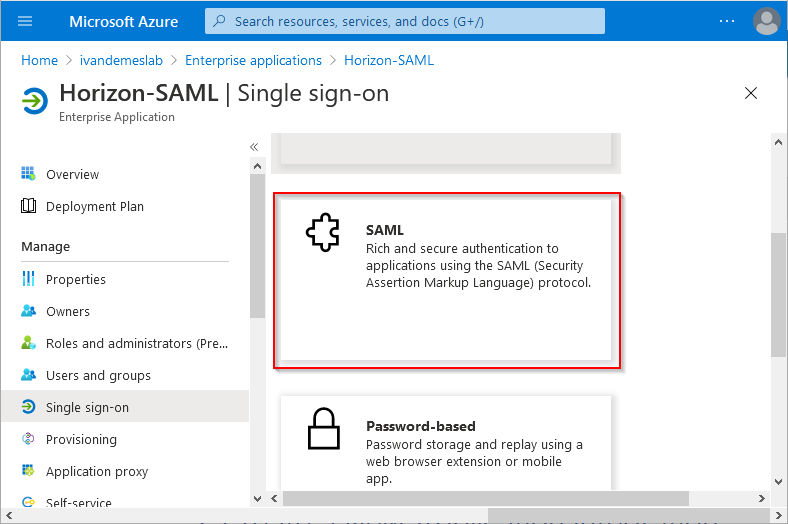
Click on SAML.
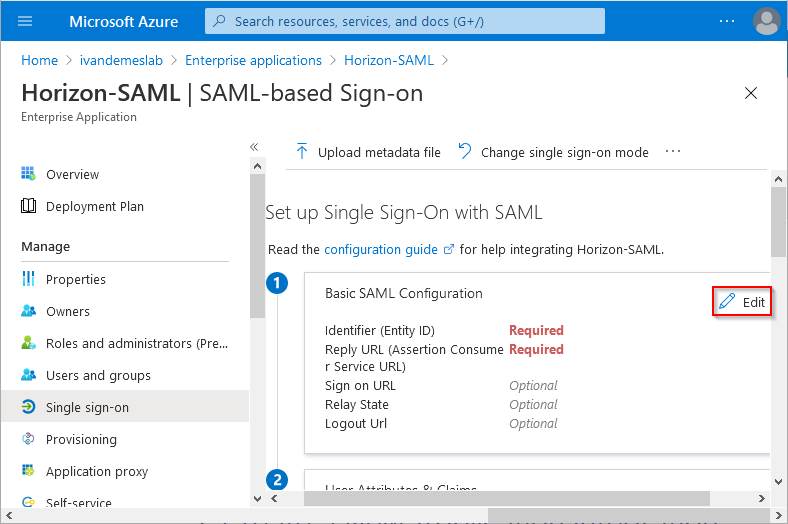
In the Basic SAML Configuration section, click on Edit.
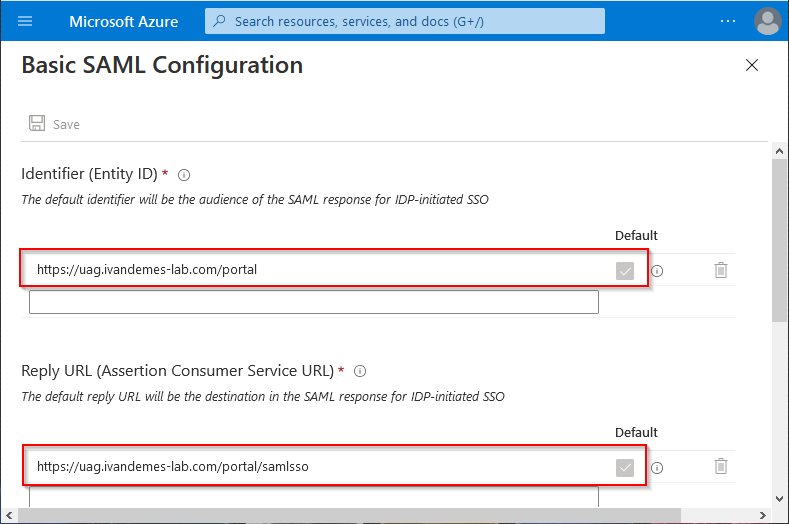
For the Identifier (Entity ID), change the Default field, and enter https://<UAG URL>/portal. Replace <> with the URL for your Unified Access Gateway.
For the Reply URL (Assertion Consumer Service URL), change the Default field, and enter https://<UAG URL>/portal/samlsso. Replace <UAG URL> with the URL for your Unified Access Gateway.
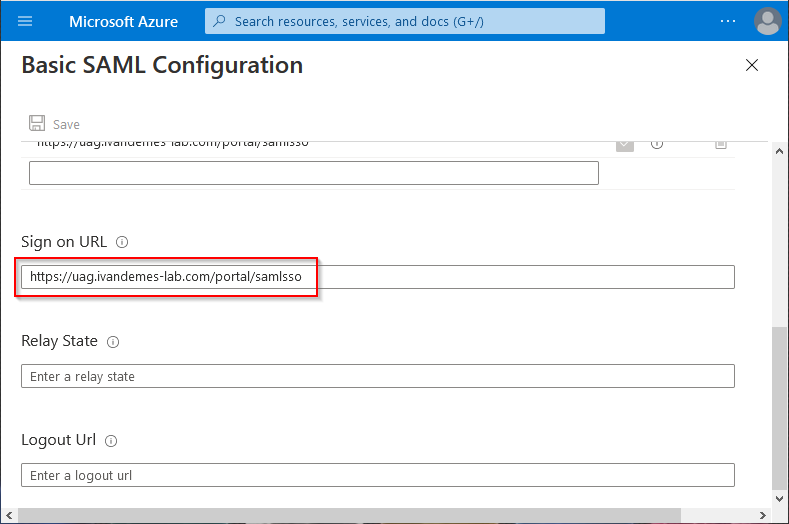
For the Sign on URL enter https://<UAG URL>/portal/samlsso. Replace <UAG URL> with the URL for your Unified Access Gateway.
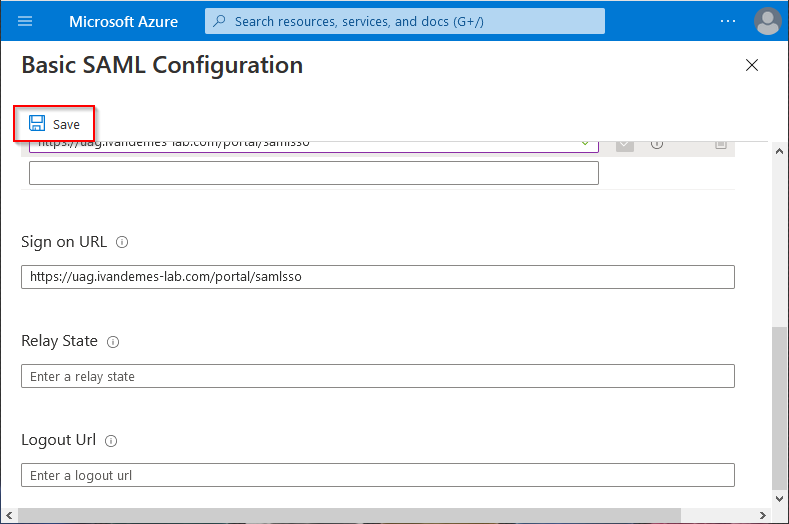
Click on Save.
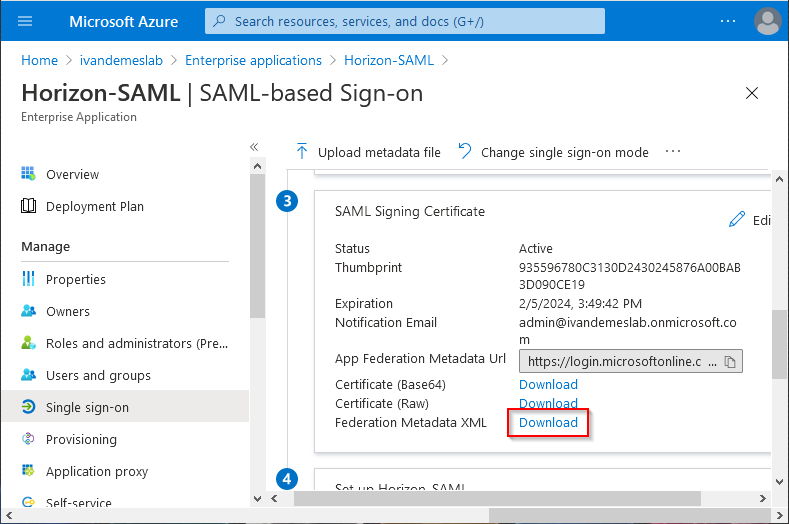
In the SAML Signing Certificate section, next to Federation Metadata XML, click on Download.
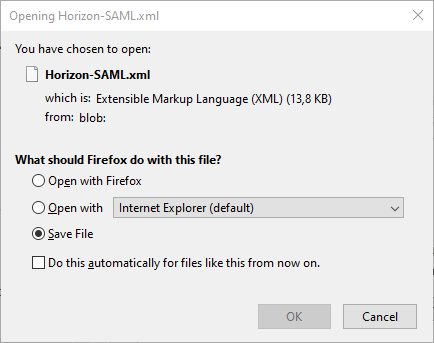
Save the file. You will need it later on.
Configuring the Unified Access Gateway for SAML Authentication
Open the Unified Access Gateway admin page by entering https://<UAG URL / UAG IP>:9443 in your web browser. Replace <UAG URL> or <UAG IP> with the URL or IP for your Unified Access Gateway. Depending on your configuration, the Unified Access Gateway admin page may be dedicated on a specific NIC / IP.
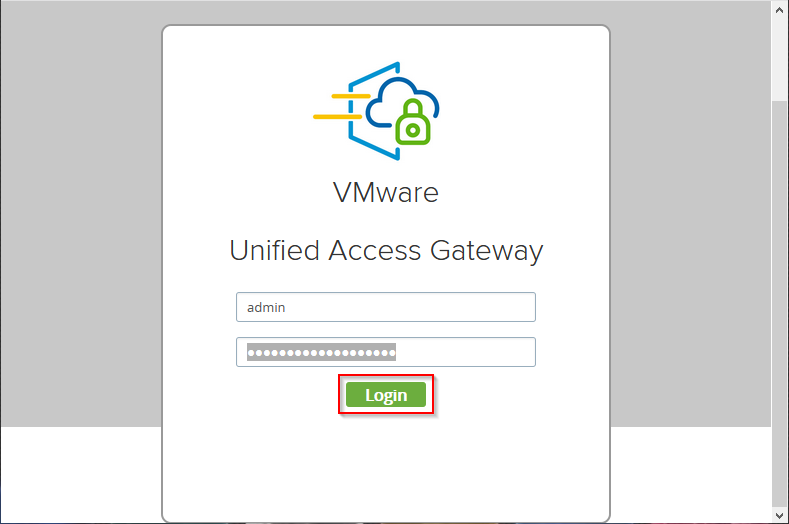
Enter your admin credentials, and click on Login.
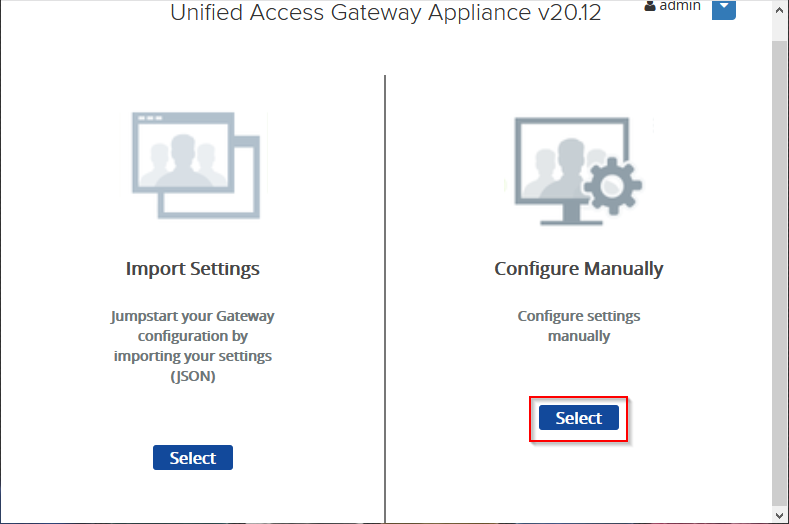
In the Configure Manually section, click on Select.
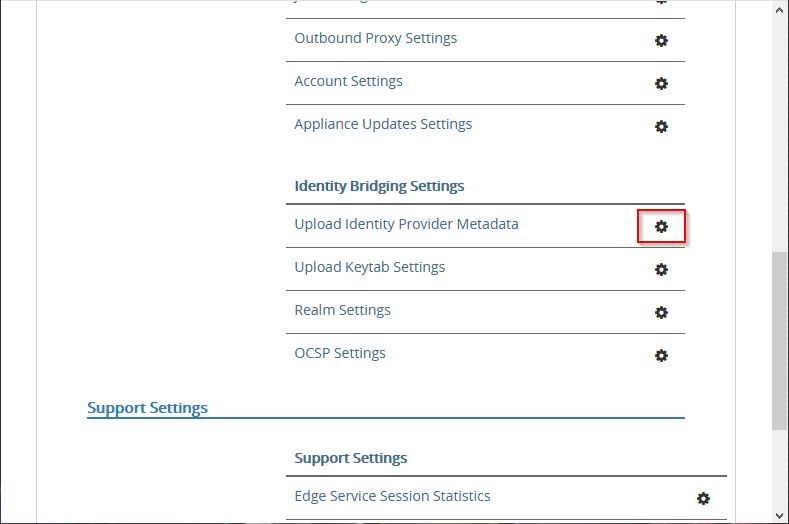
Next to Upload Identity Provider Metadata, click the gear icon.
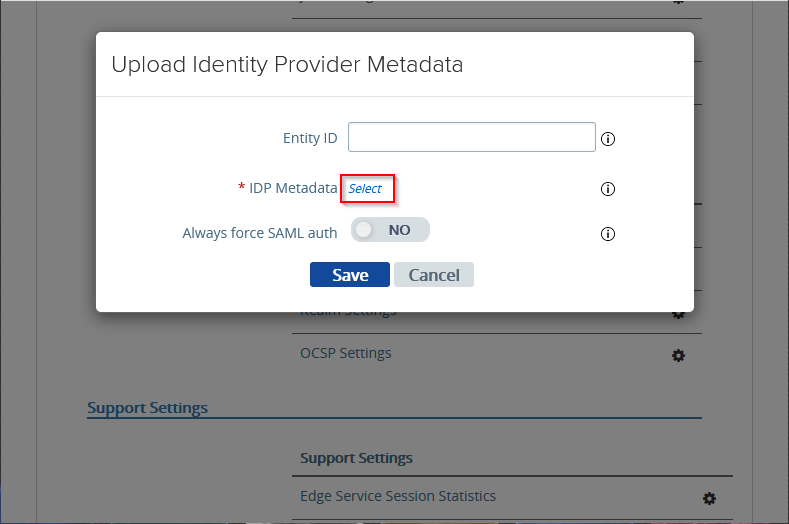
Next to IDP Metadata, click Select.
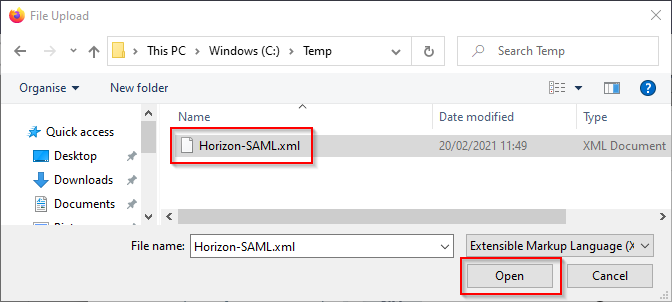
Select the SAML metadata file you saved previously, and click on Open.
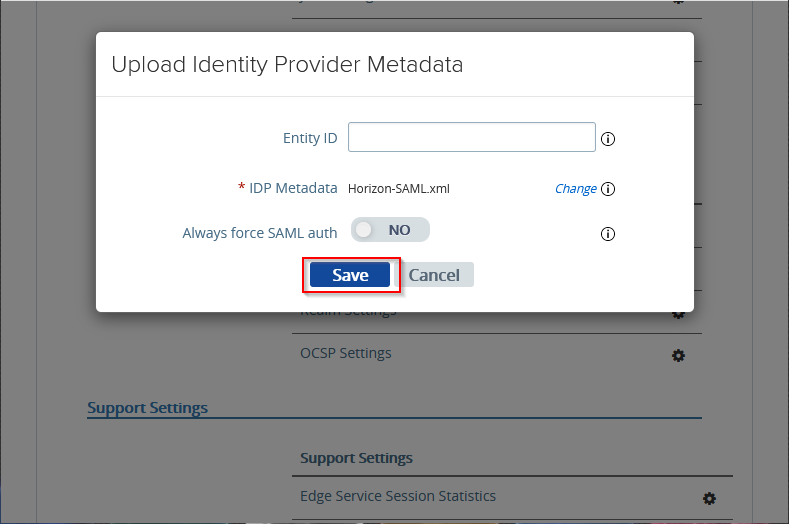
Click on Save.
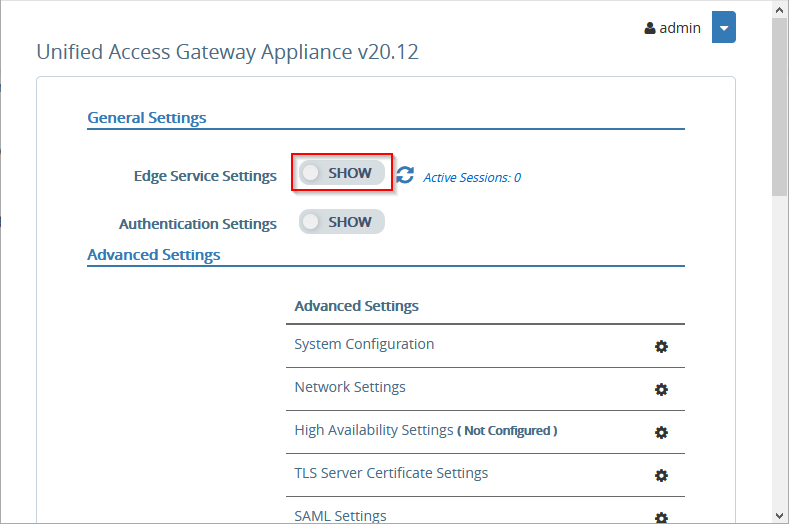
Next to Edge Service Settings, click the SHOW slider.
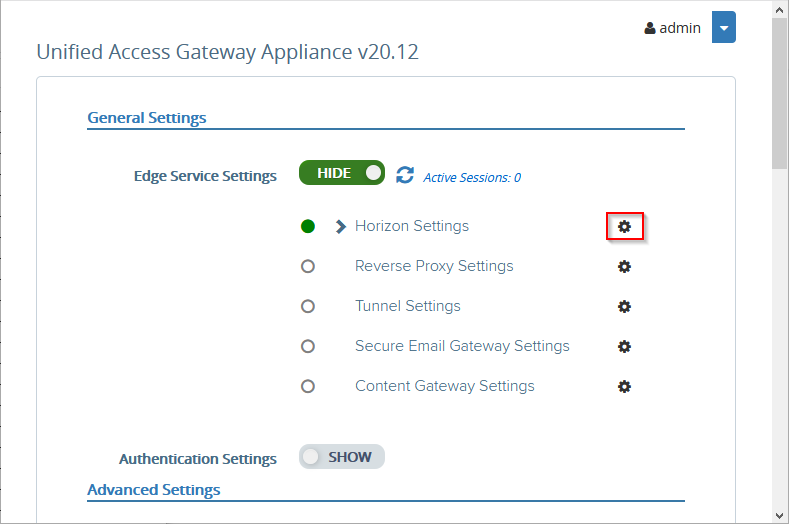
Next to Horizon Settings, click the gear icon.

Click on More.
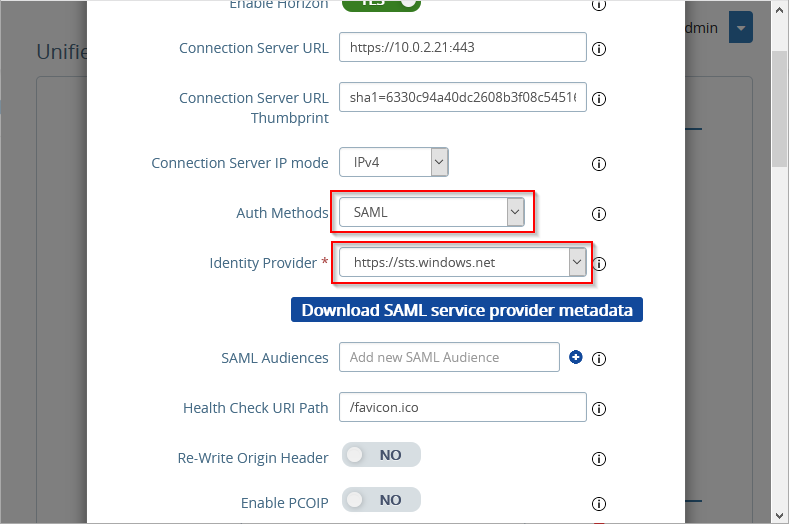
For Auth Methods, select SAML or SAML + passthrough. Select SAML if you want to use True SSO for single sign-on to the Horizon apps and desktops. Select SAML + passthrough if you want to use Active Directory authentication when launching Horizon apps and desktops.
For Identity Provider, select https://sts.windows.net.
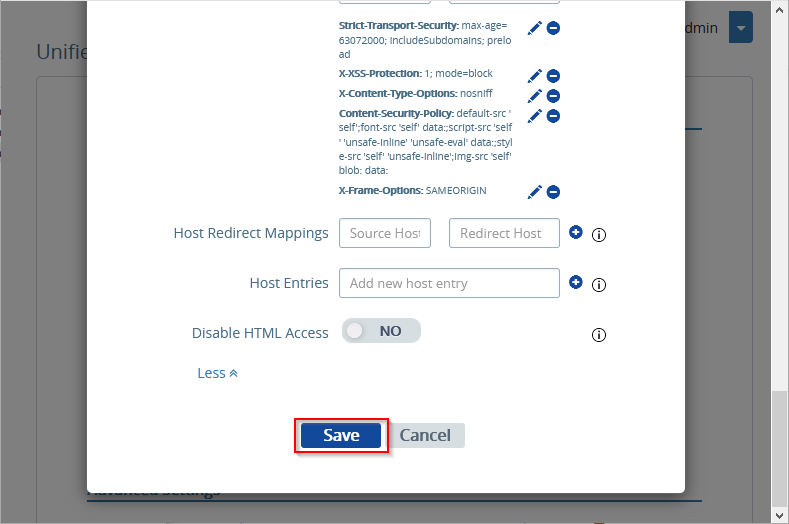
Scroll down, and click on Save.
Configuring Horizon for SAML Authentication
Open the Horizon admin page by entering https://<Connection Server URL / Connection Server IP>/admin in your web browser. Replace <Connection Server URL> or <Connection Server IP> with the URL or IP for your Horizon Connection Server.
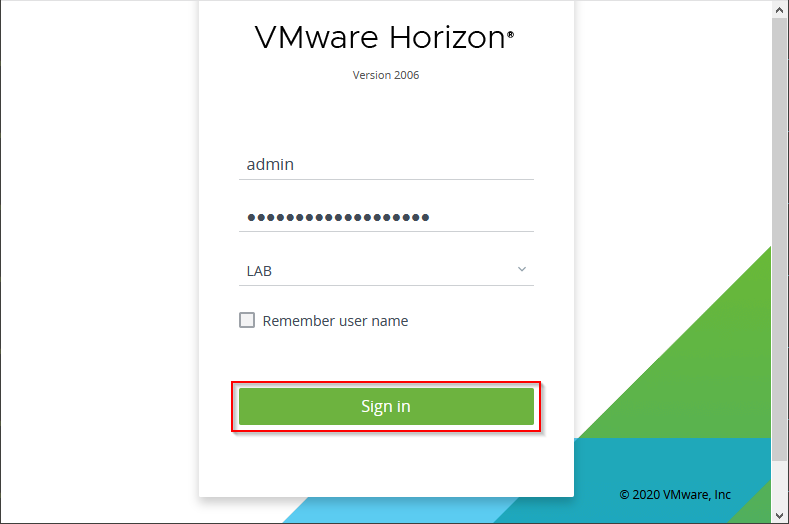
Enter your admin credentials, and click on Sign in.
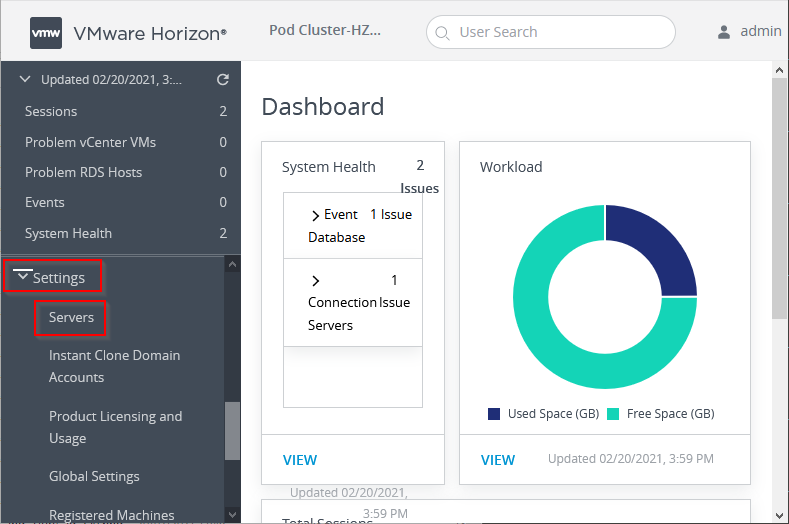
Open Settings, and click on Servers.
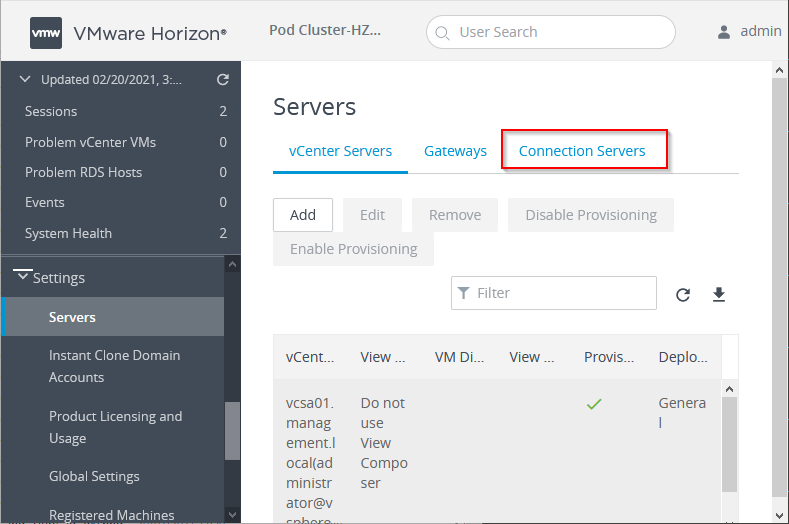
Click on Connection Servers.
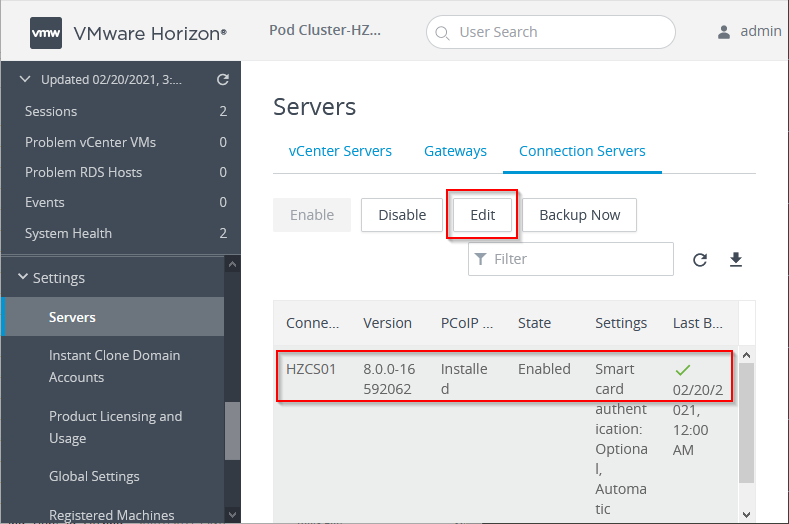
Select the Connection Server, and click on Edit.
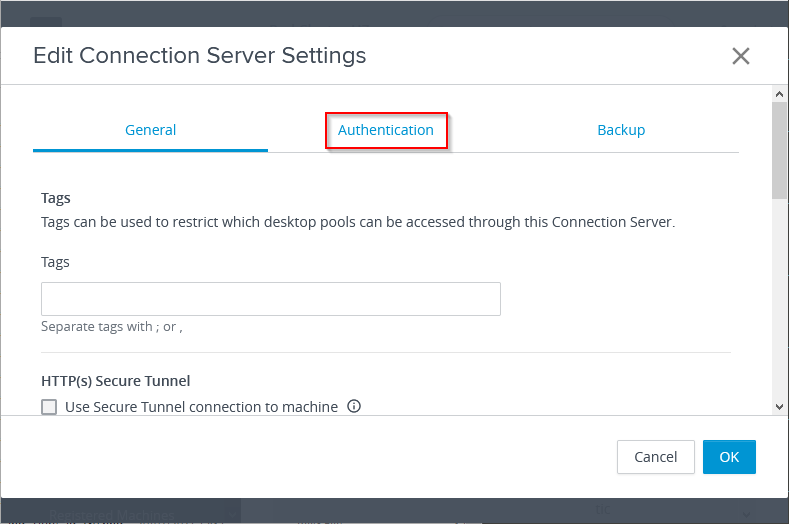
Click on Authentication.
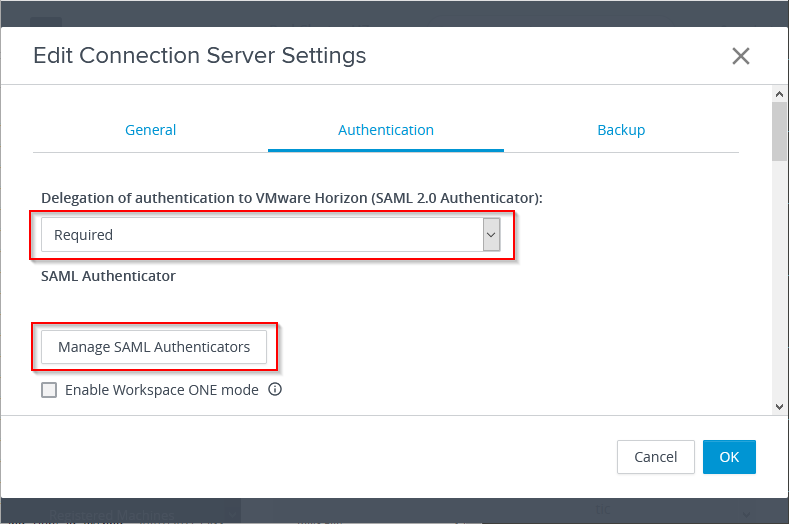
For Delegation of authentication to VMware Horizon (SAML 2.0 Authenticator), select Required.
Click on Manage SAML Authenticators.
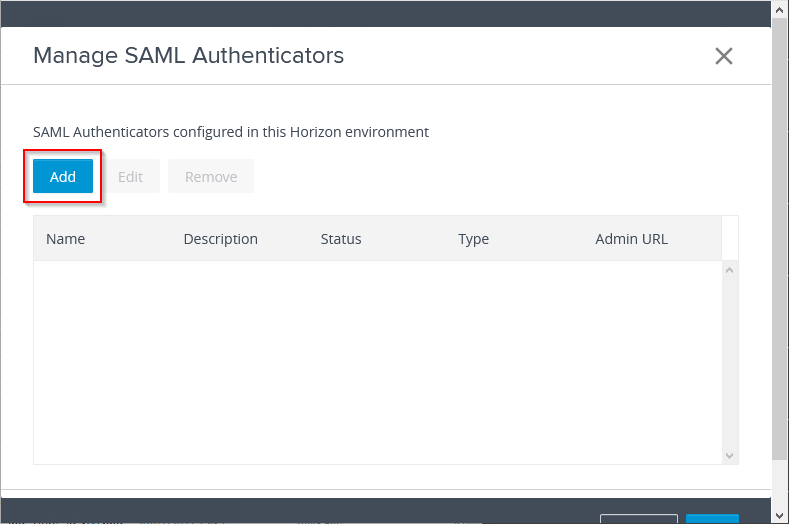
Click on Add.
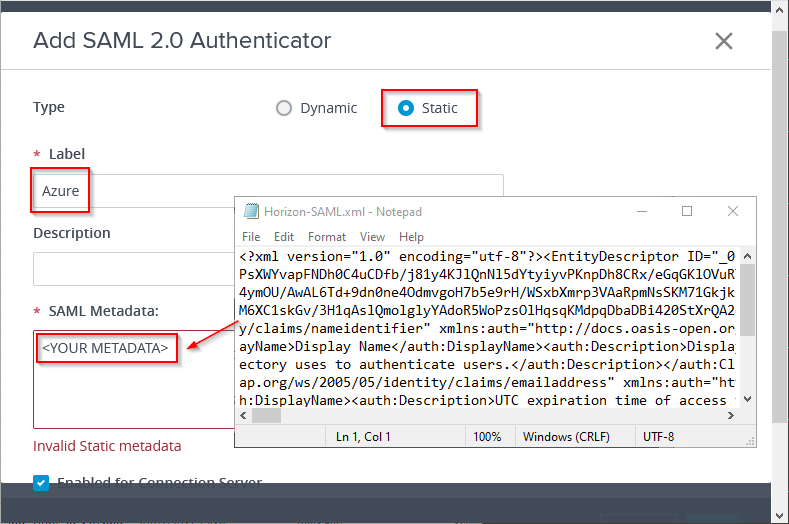
Select Static. The Dynamic option is not possible to use, because of the question mark (?) in the Azure AD SAML metadata URL.
For Label, enter a name for the SAML 2.0 Authenticator. The label Azure is used in this example, and is important to remember when configuring True SSO later on.
Open the SAML metadata file, saved previously, and copy / paste the content into the SAML Metadata field.
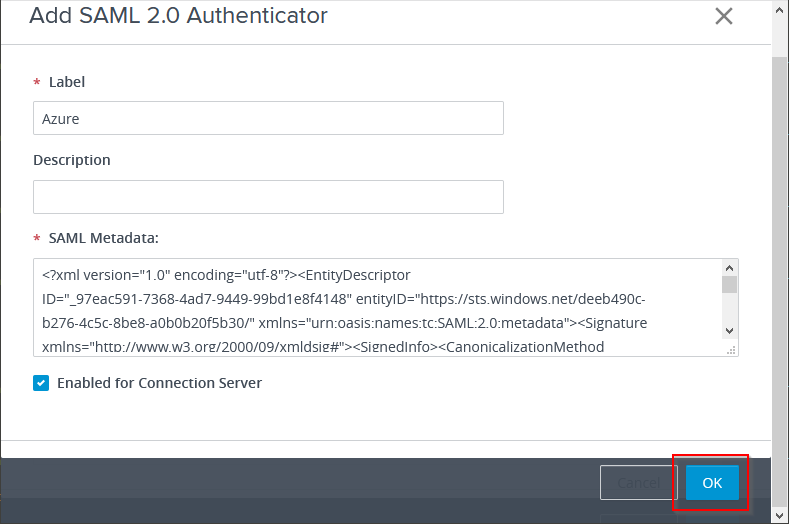
Click on OK.
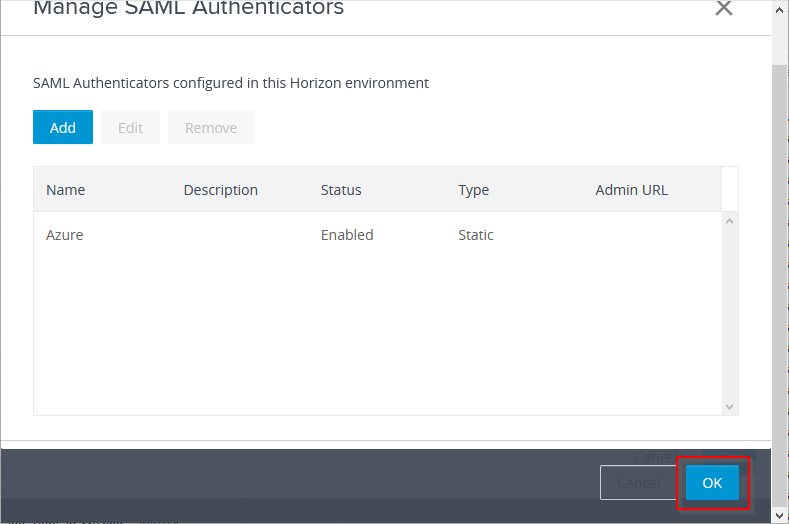
Click on OK again.
!! Repeat the steps from this chapter for each Horizon Connection Server for which you want to enable SAML authentication. !!
Configuring True SSO
On your Horizon Connection Server(s), the following steps have to be executed to enable True SSO, and allow single sign-on to Horizon apps and desktops using the SAML authenticator from the previous chapter.
On your Horizon Connection Server(s), open a Command Prompt.
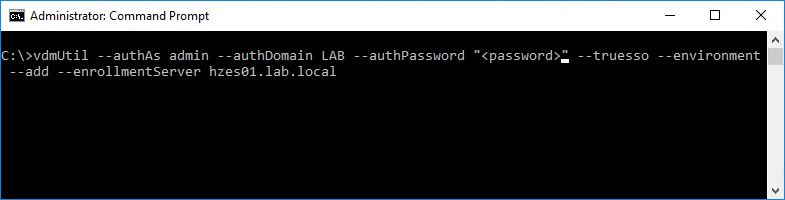
Run the following command to add the Enrollment Server to the list.
vdmUtil --authAs <username> --authDomain <domain> --authPassword "<password>" --truesso --environment --add --enrollmentServer <enrollment server fqdn>
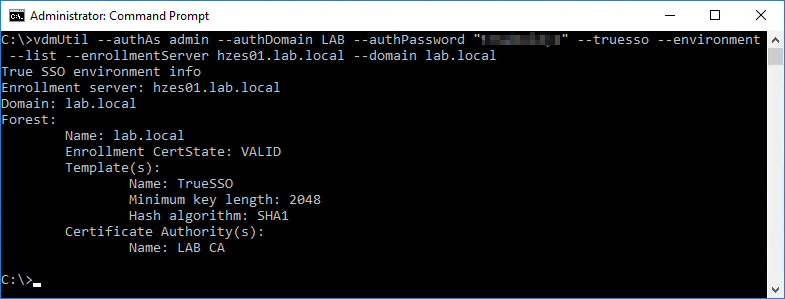
Run the following command to output the forest name, whether the certificate for the enrollment server is valid, the name and details of the certificate template you can use, and the common name of the certificate authority.
vdmUtil --authAs <username> --authDomain <domain> --authPassword "<password>" --truesso --environment --list --enrollmentServer <enrollment server fqdn> --domain <domain fqdn>

Run the following command to create a True SSO connector, which will hold the configuration information, and enable the connector.
vdmUtil --authAs <username> --authDomain <domain> --authPassword "<password>" --truesso --create --connector --domain <domain fqdn> --template <certificate template name> --primaryEnrollmentServer <primary enrollment server fqdn> --certificateServer <certificate server name> --mode enabled
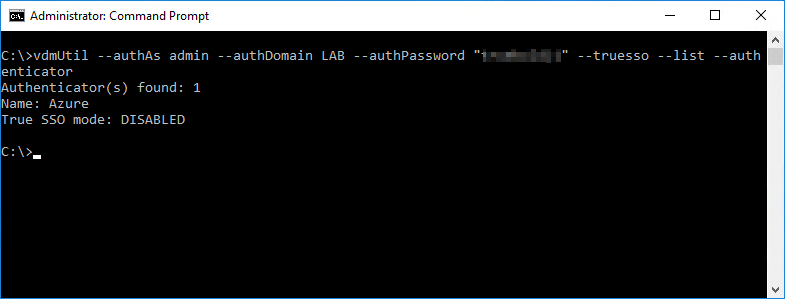
Run the following command to display the available SAML authenticators.
vdmUtil --authAs <username> --authDomain <domain> --authPassword "<password>" --truesso --list --authenticator
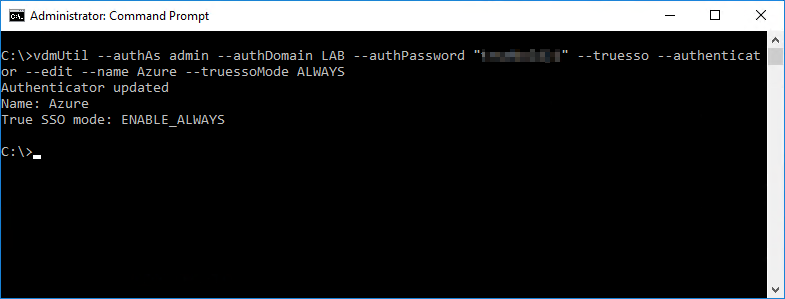
Run the following command to enable the authenticator to use True SSO mode.
vdmUtil --authAs <username> --authDomain <domain> --authPassword "<password>" --truesso --authenticator --edit --name <authenticator name> --truessoMode ALWAYS
Logon and Connection Example
So, now that we have the configuration in place, let’s see what it looks like from a user perspective.
This example assumes the user hasn’t yet been authenticated against Azure AD (the IdP).
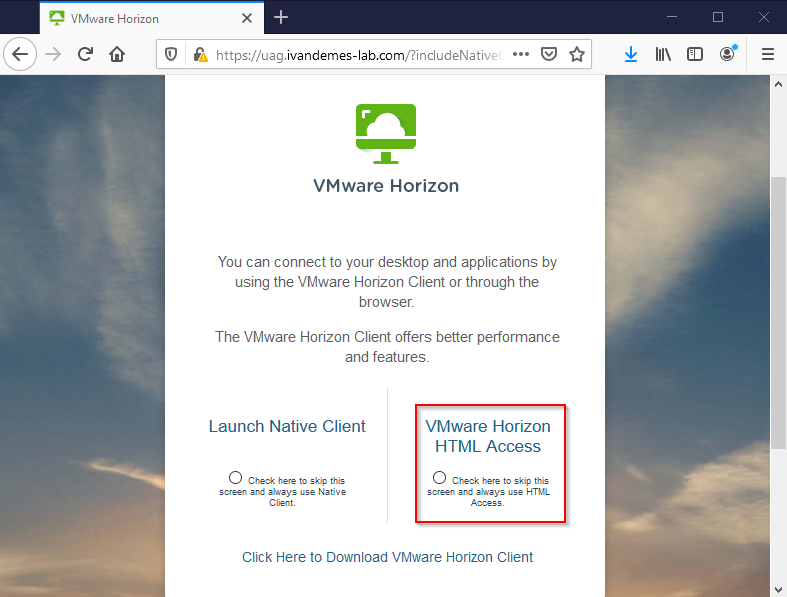
Once connected to the Unified Access Gateway URL, the use clicks on VMware Horizon HTML Access.
The user gets redirected to Azure AD (IdP) for authentication.
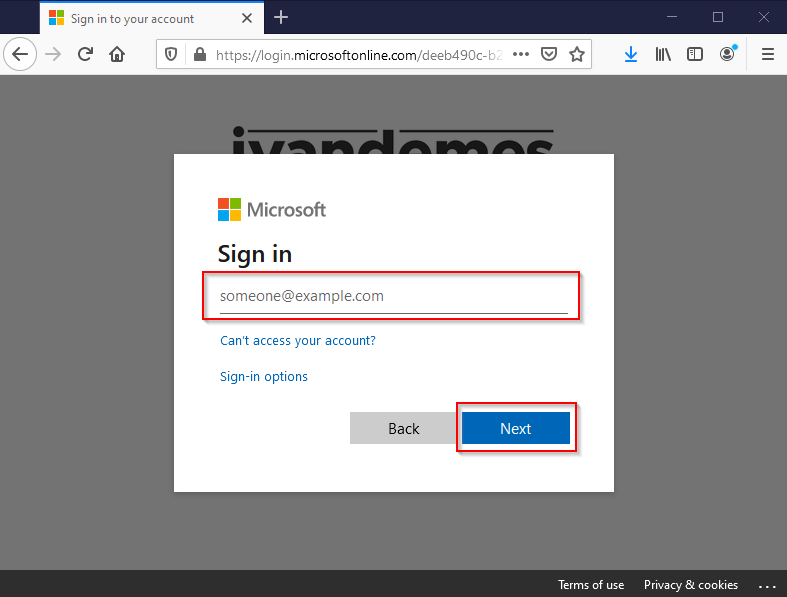
The user enters his/her username (e-mail address / user principal name), and clicks on Next.
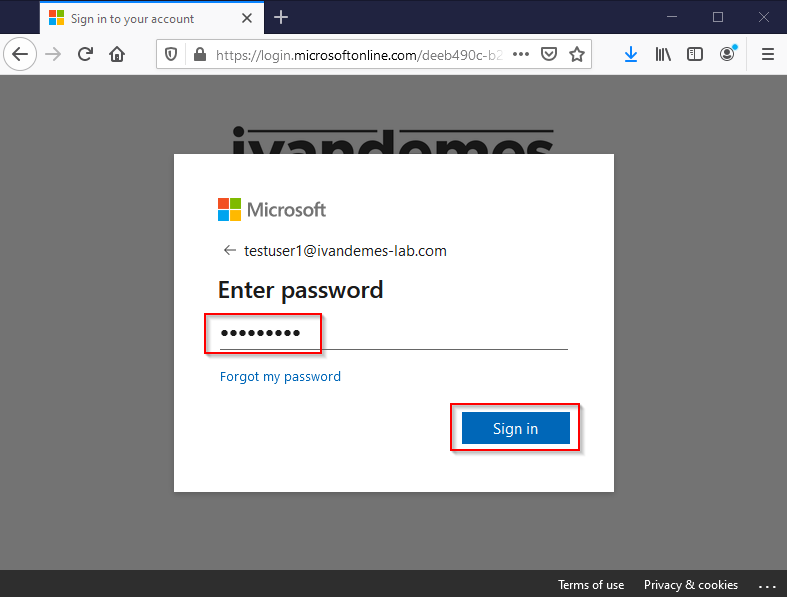
The user enters his/her password, and clicks on Sign in.
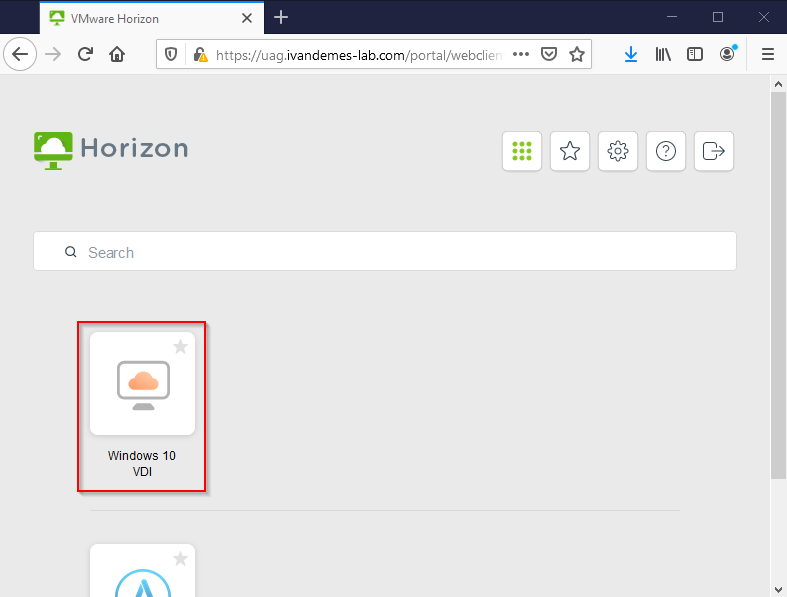
The user is presented his/her Horizon apps and/or desktops.
The user clicks on Windows 10 VDI.
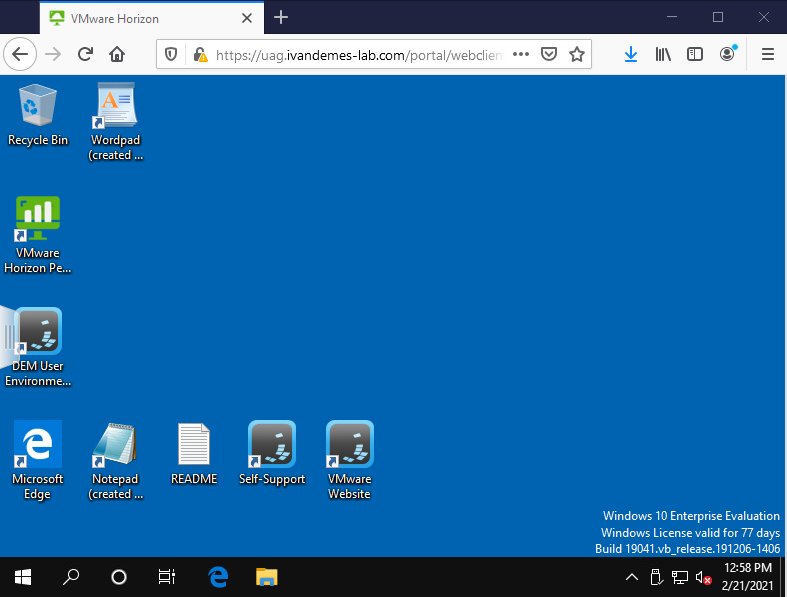
The Horizon desktop is presented to the user, without asking for AD credentials.
Horizon Apps & Desktops (third-party) Workspace Portal Integration
Maybe the word “integration”, is a bit too much in this case. But, nevertheless I will still call it “integration” moving forward.
Most of the third-party workspace solutions don’t have a connector, or something similar, for integrating or provinding access to Horizon apps and desktops in their solution. It is possible to integrate Horizon apps and desktops in your own workspace portal solution by using direct URL’s to Horizon apps and desktops.
Just imagine that the workspace portal is configured to authenticate using Azure AD, the user uses the workspace portal, and is already authenticated using Azure AD and is shown the direct URL’s to the Horizon apps and desktops he/she is authorized to use. The high level, simplified flow below explains it a bit more clear (I hope ;-)).
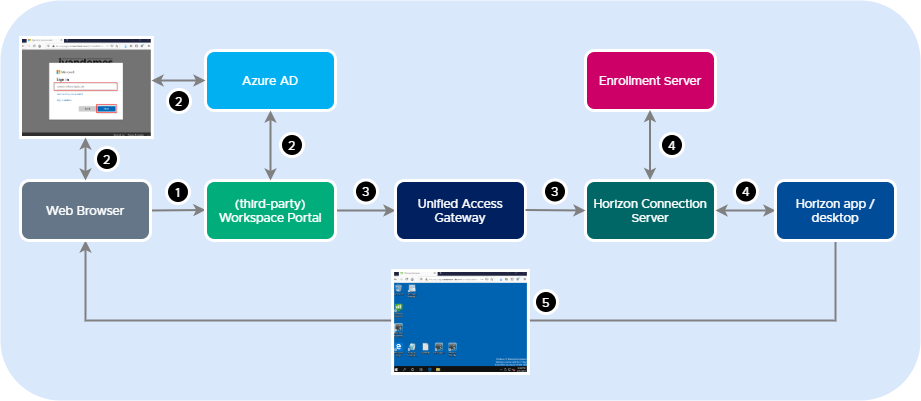
(1) The user opens the workspace portal.
(2) The user gets authenticated against Azure AD.
(3) The user opens a Horizon app or desktop (direct URL) and connects to the Unified Access Gateway / Horizon. The user doesn’t need to re-authenticate, since this is already done in step 2.
(4) The Horizon app or desktop is launched. The user doesn’t have to provide his/her AD credentials. Single sign-on (AD) authentication is handled by True SSO.
(5) The Horizon app or desktop is presented in the user’s web browser.
Now this may not be ideal from a systems management or access management perspective. But, it is possible. And it may just suit you when you have only one, or a small amount of Horizon apps and desktops that you want to provide (HTML5) access to from your workspace portal, next to your SaaS apps.
Direct URL’s to Horizon apps and desktops using Unified Access Gateway have the following syntaxes.
Horizon HTML5 client
https://<UAG URL>/portal/webclient/index.html?applicationName=Calculator
This launches the Calculator application. Use %20 to replace a space character in the name.
https://<UAG URL>/portal/webclient/index.html?desktopName=Windows%2010%20VDI
This launches the Windows 10 VDI desktop. Use %20 to replace a space character in the name.
Horizon native client
https://<UAG URL>/portal/nativeclient/Calculator?action=start-session&desktopProtocol=BLAST&launchMinimized=false
This launches the Calculator application, using the BLAST protocol. Use %20 to replace a space character in the name.
I hope this blog post was informative. If you have any questions or comments, please reach out on Twitter or LinkedIn.