App Volumes 4.0 Beta: My First Review
Recently VMware announced the public availability of App Volumes 4.0 Beta. This new major version introduces a different approach to creating, managing and assigning applications compared to the 2.x version of App Volumes. This blog post gives you a “short” introduction to the most important changes and my personal review and opinion on this beta. For those interested, a more in-depth walkthrough is also provided.
Please be aware that App Volumes 4.0 Beta is work-in-progress. Features and options may change. As well as my opinion 😉
From AppStacks to Applications
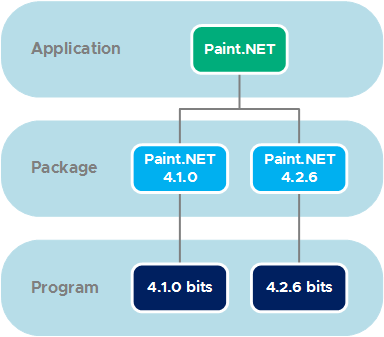
In the 2.x version of App Volumes, AppStacks were used to bundle applications. For instance, one could create an AppStack for default applications and another AppStack for departmental applications. Although doable for some, it could bring a big hassle when you had to update one application within the AppStack. This is has been changed in App Volumes 4.0, where three key principles are introduced. Packaging has been decoupled from application delivery, and AppStacks are replaced by Applications, Packages and Programs. Moreover, easier application lifecycle management has been introduced and you can now deploy once and deploy anywhere. This whole concept is what VMware calls Simplified Application Management (SAM). Where SAM provides for the ability to go through an application testing, production, and retirement cycle.
Simplified Application Management
SAM is made possible by using the following three concepts.
Application:
- Created first
- Logical construct
- Used for assignments
- May contain one or many packages
- Requires package with CURRENT marker for dynamic assignment
- Static assignment to a specific package version is possible
- Don’t use version numbers in the name
Package:
- Created second
- Provisioning VM to capture application to VMDK
- Closest construct to an AppStack (legacy)
- Uses application template
- Choose package stage (New, Tested, Published, Retired)
- Only one package in an application can be CURRENT
Program:
- Auto-generated during package creation
- Program name is automatically created (Name, Version, Publisher)
- Executables and actual bits are captured during package creation
- Program may contain a single or multiple application installers
To give you a clear overview, here is how Application, Package, and Program tie together in App Volumes 4.0.
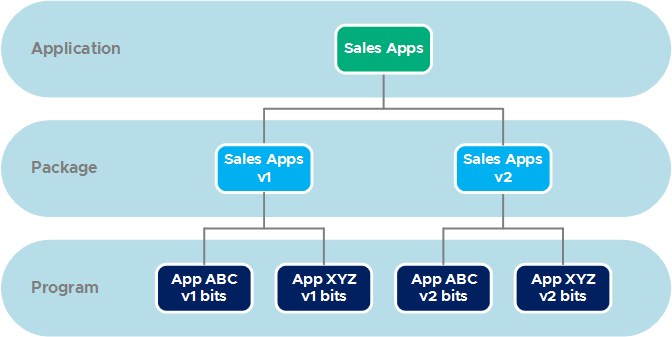
It is still possible to create application bundles for departments for instance, by using the following concept.
Interface changes
If you are familiar with the App Volumes 2.x interface, you will easily go through the App Volumes 4.0 interface, because not much has changed. Although I would have liked the interface to have the Clarity design, like most of the other VMware products and services have.
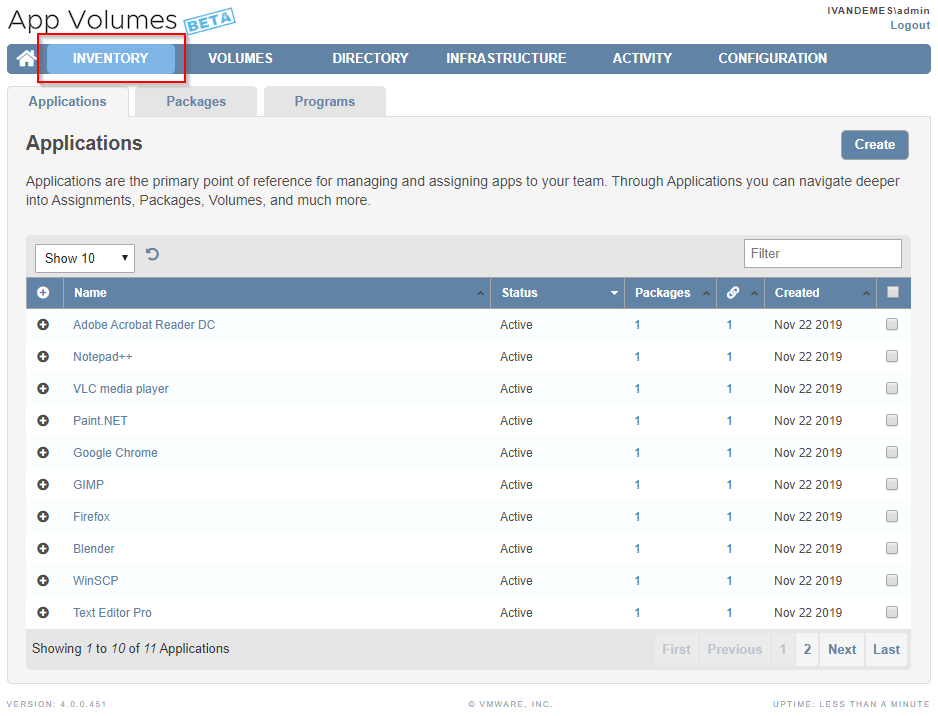
One thing that has been added to App Volumes 4.0 is the Inventory tab. This tab contains the Applications, Packages and Programs sections, which I explained in the previous section.
Performance
The Management Console behaves as expected and similar to the 2.x version, which was, and still is good. Regarding the client/agent performance, it’s difficult to say anything about the performance in numbers, as I deployed App Volumes 4.0 Beta in a non-optimized lab environment. No OSOT, no tuning, nothing. What I did notice is that twelve applications (VMDK’s in that perspective) were quickly attached to my test client and logon was pretty swift.
You can skip to my Provisional Conclusion or continue the In-depth Walkthrough.
In-depth Walkthrough
To give you a better understanding of going through the SAM process, I am going to create an application and two packages (one old version and one new version) and walk you through. I am using the application Audacity in this example. The global steps are as follows.
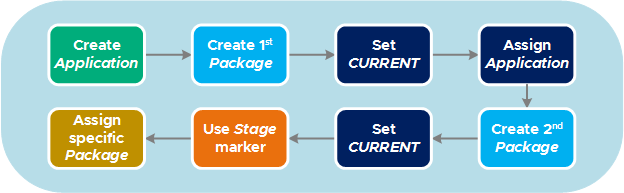
Creating the Application

In the Applications tab, click Create.
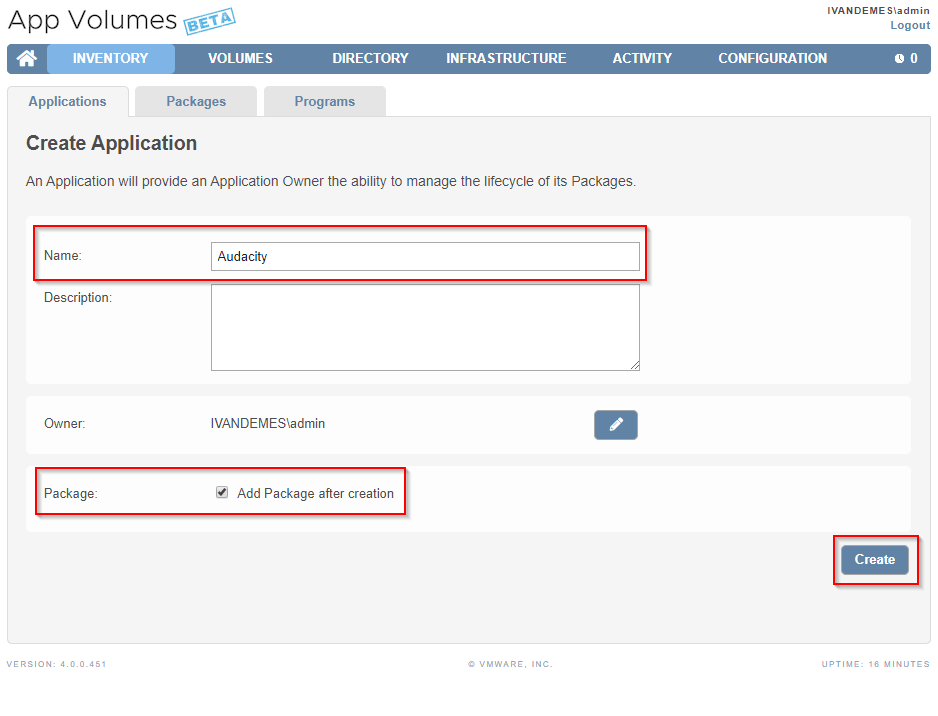
Enter a Name (Audacity is the logical name without version for this application), select Add Package after creation and click Create.

Click Create to confirm the creation of the application.
Creating the first Package

Enter a Name (Audacity 2.3.2 specific name for this version of the package), select Stage (where New sounds logical in this case 😉 ) and click Create.

Select either Perform in the background or Wait for completion and click Create. The actual VMDK for the package is now being created.
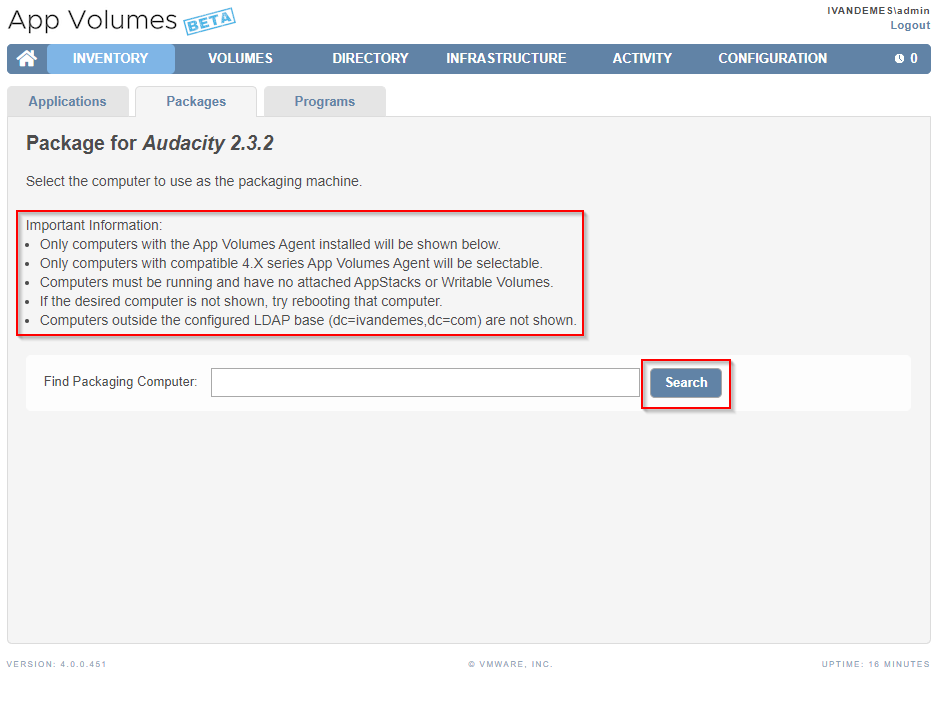
Don’t forget to read the Important Information, because it is, uh…, important 😉 , and click Search to find a Packaging Computer. Make sure you have a VM ready with the App Volumes 4.x Agent installed, and don’t forget to make a Clean snapshot of the VM. This way you can go back to a clean state after application installations.

Select a Packaging Computer and click Package.
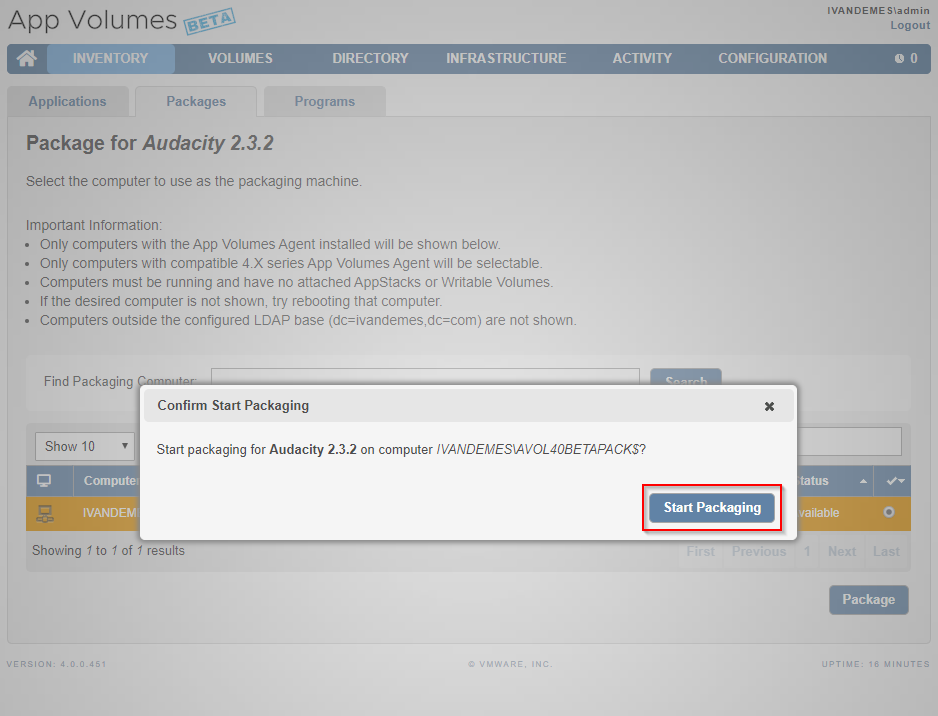
Confirm by clicking Start Packaging.

Now go to your packaging VM and wait for the message Please install the application. Do NOT click the OK button before installing the application.
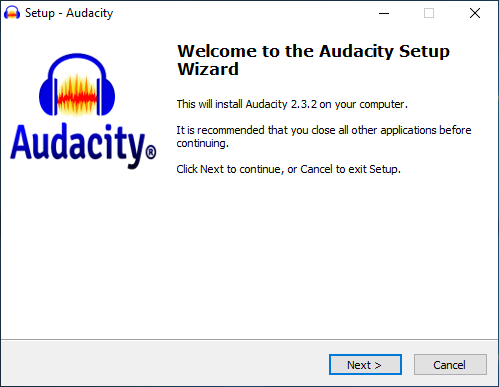
Start and finish your application installation.
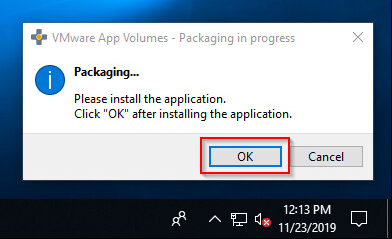
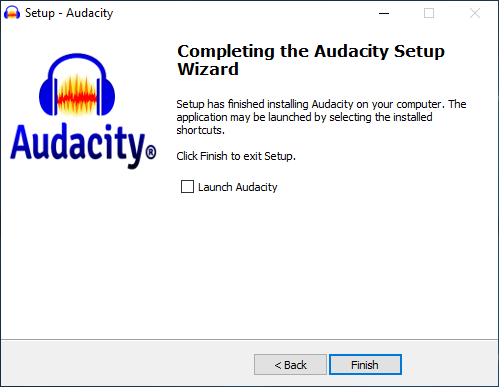
Click the OK button once the application installation has been completed.
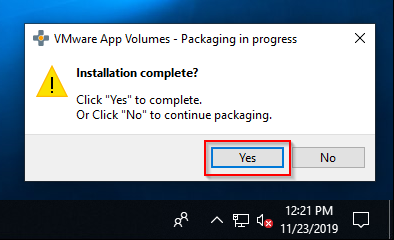
Click the Yes button to confirm that the installation is complete.
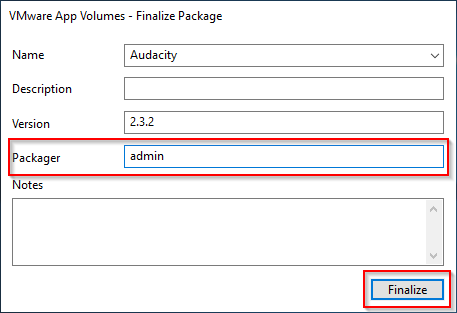
Enter a name for the Packager (required) and click Finalize.
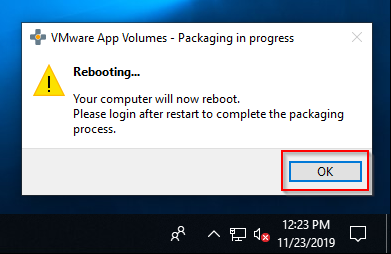
Click OK to reboot the packaging VM and login when it’s up again.
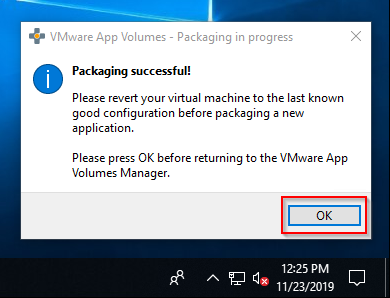
Click OK, and the package has been created.
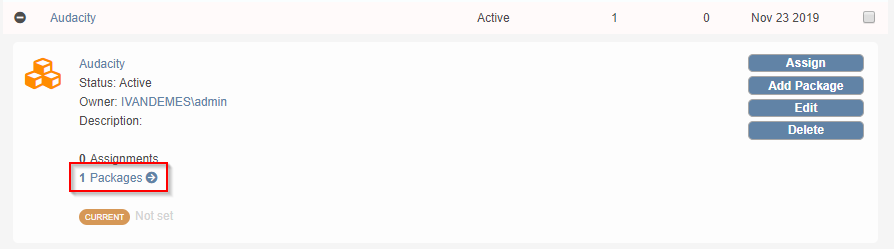
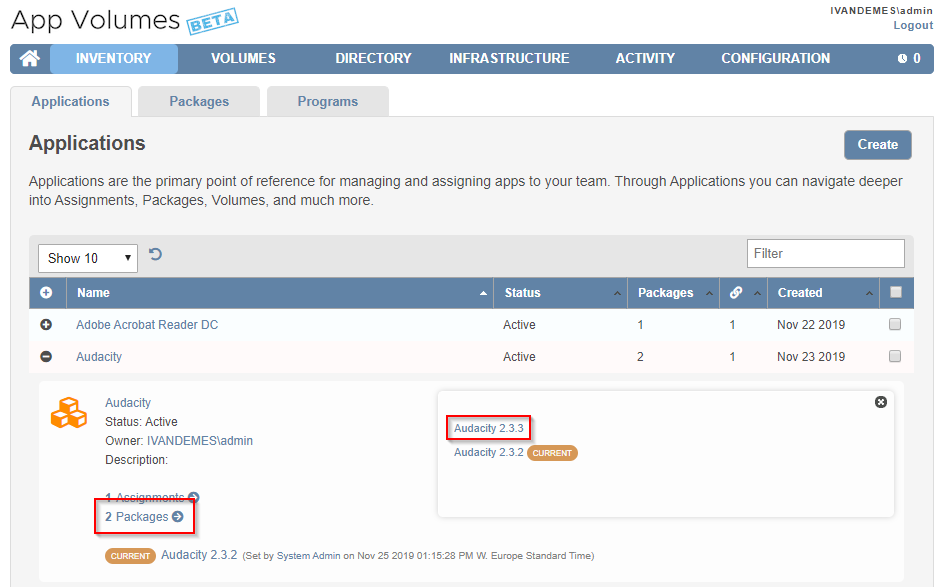
In the App Volumes 4.0 Management Console you can see that the application Audacity now has one package.
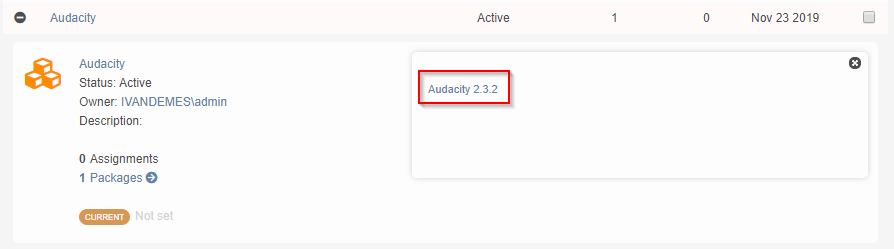
You can click on this package to see more information.
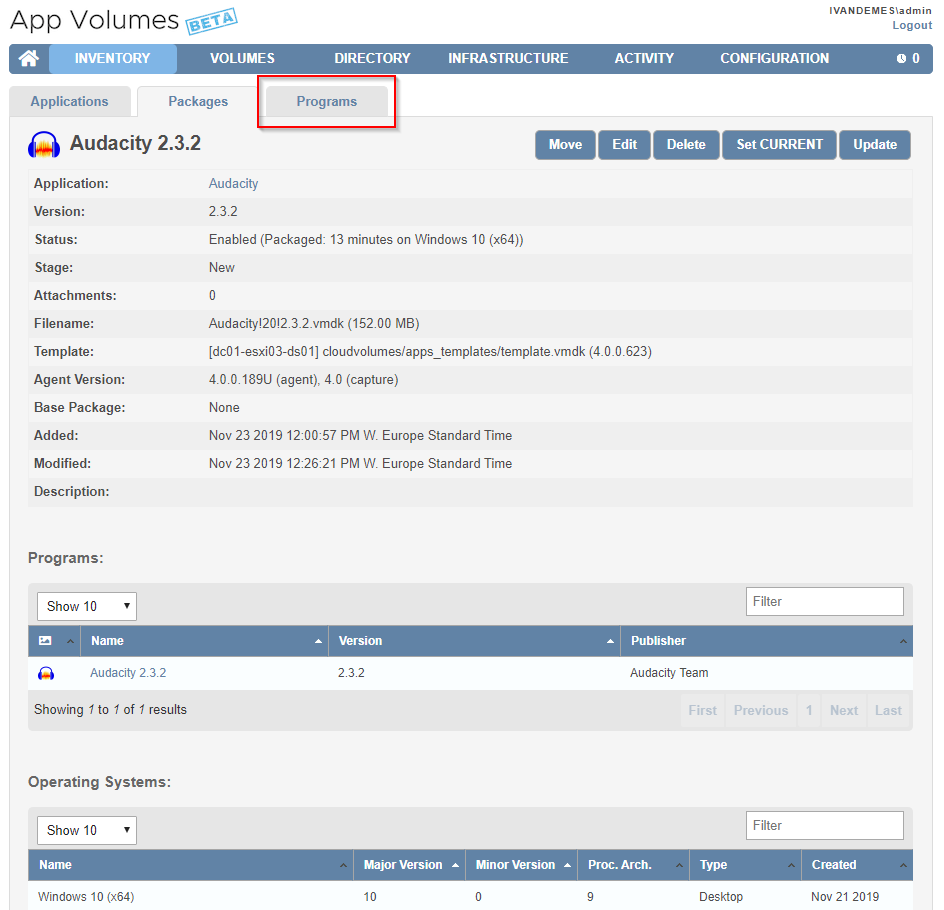
When you click the Programs tab, you will see all existing Programs, including Audacity 2.3.2.
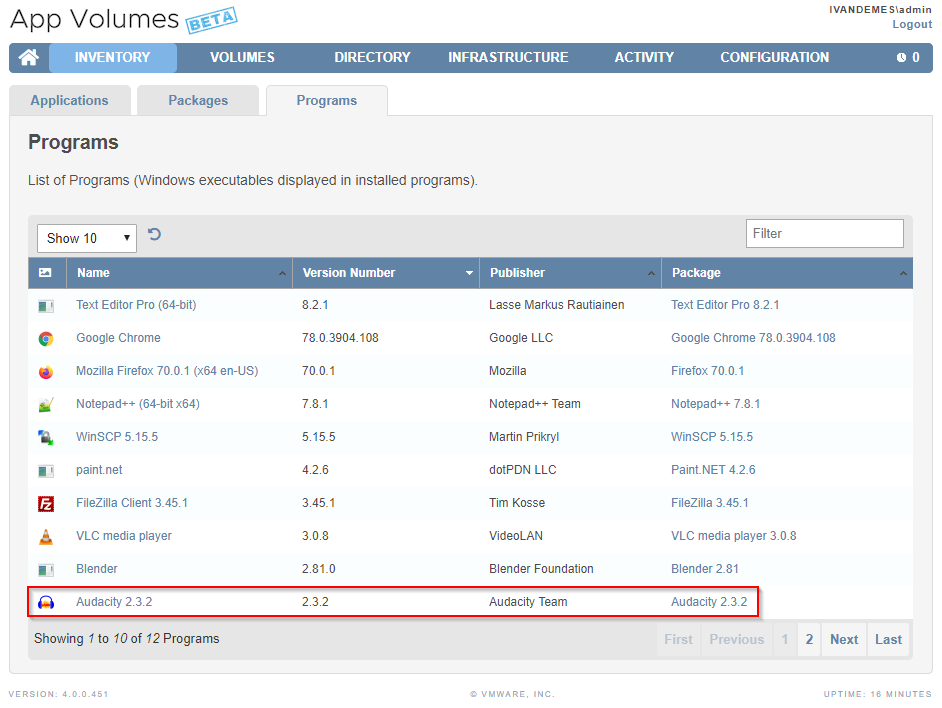
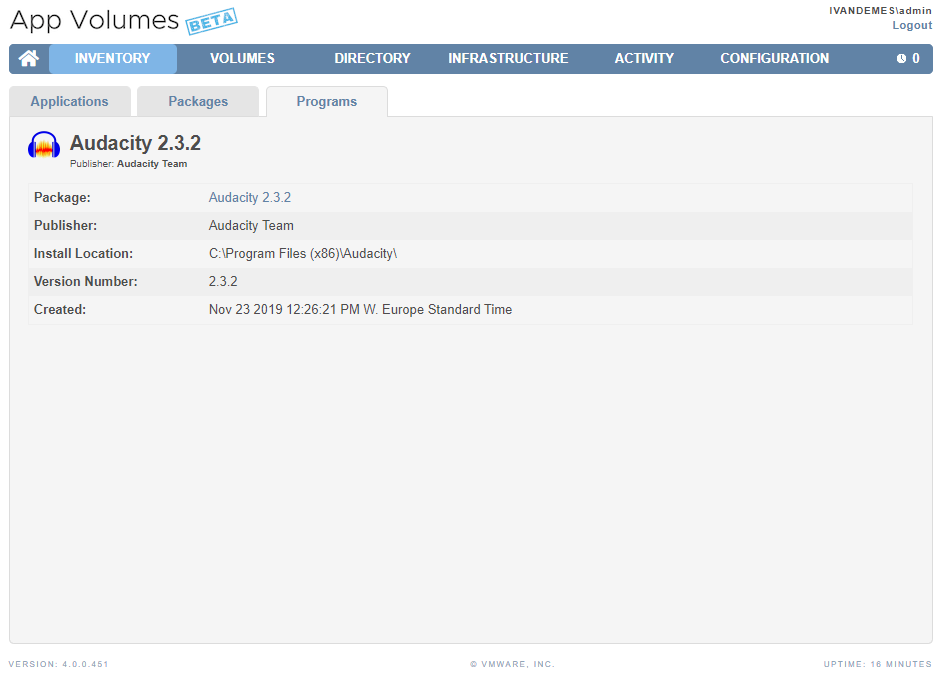
Clicking on the Program will show you the Publisher and the Install Location.
Setting the Current package and configuring the Assignment
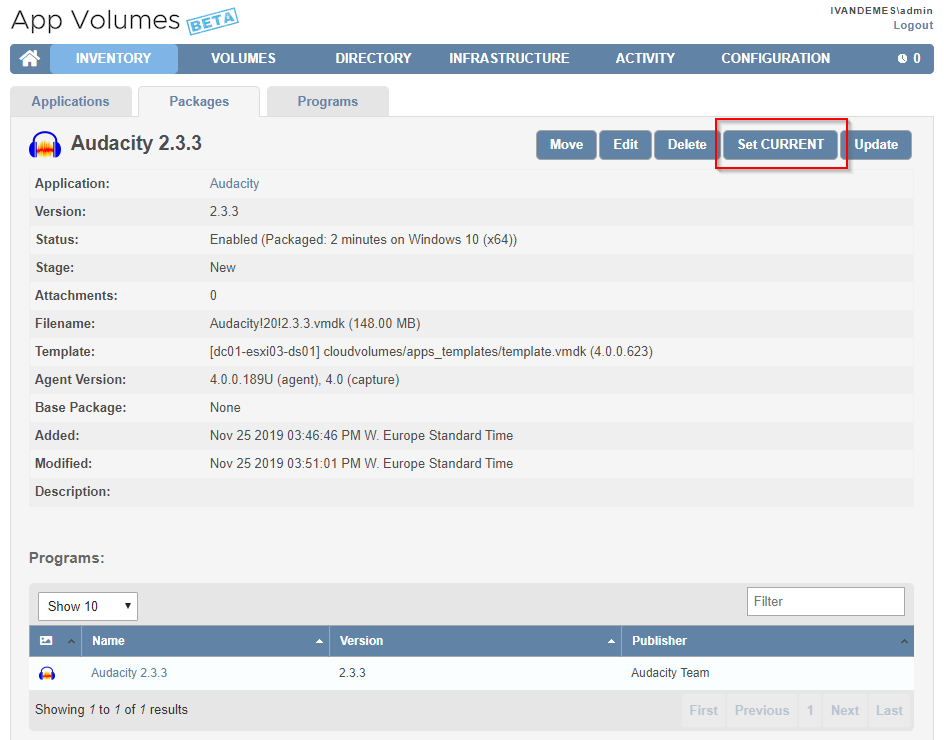
Head back to the Packages tab.
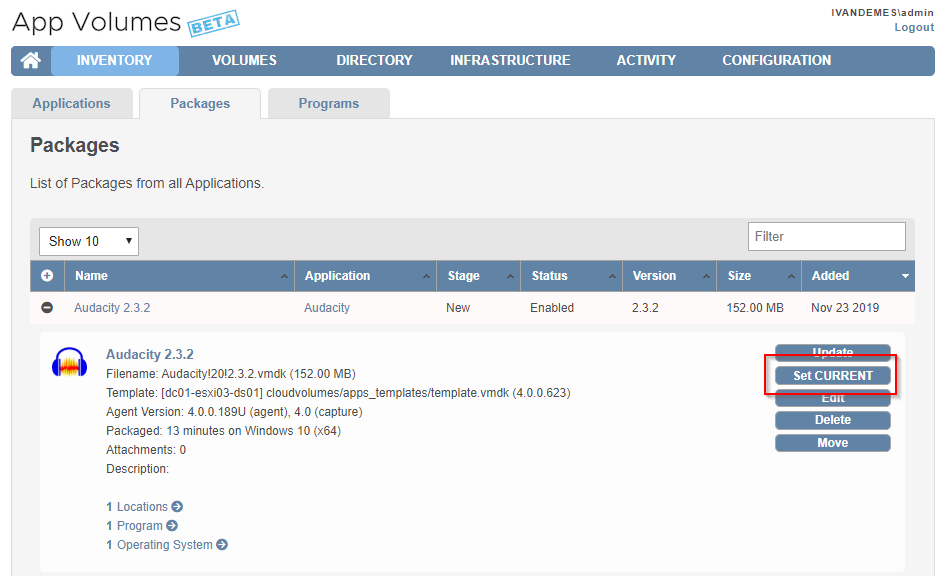
Fold-out the package using the (+) button and click Set CURRENT. This marks the selected package as the current version for the application.
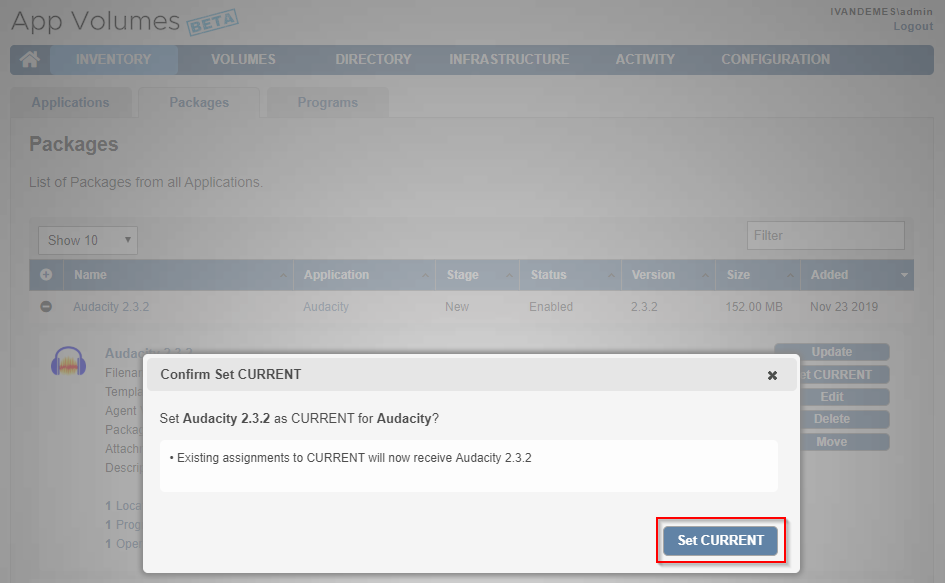
Confirm that the existing assignments, which we will configure in the next step, will receive the selected current version by clicking Set CURRENT. Go back to the Applications tab.

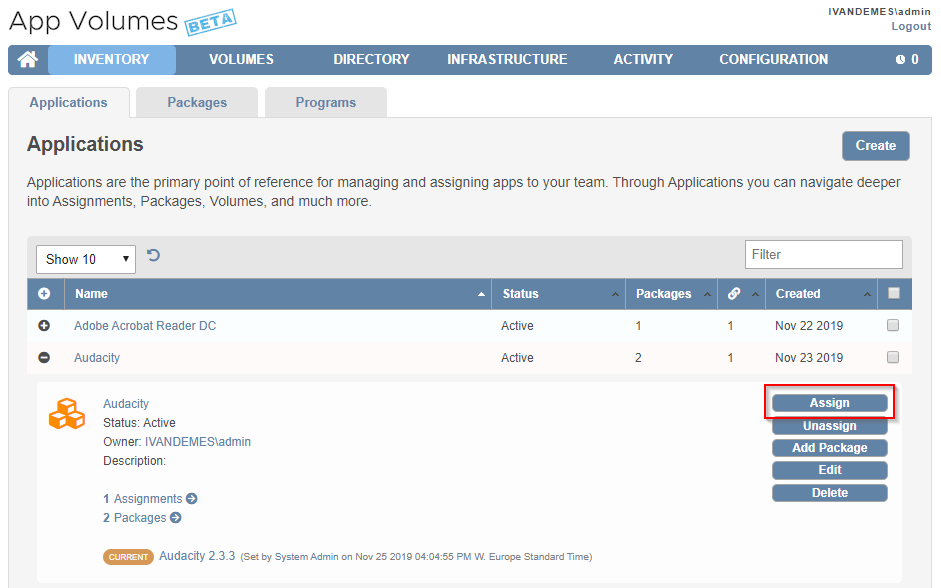
Fold-out the application using the (+) button and click Assign.
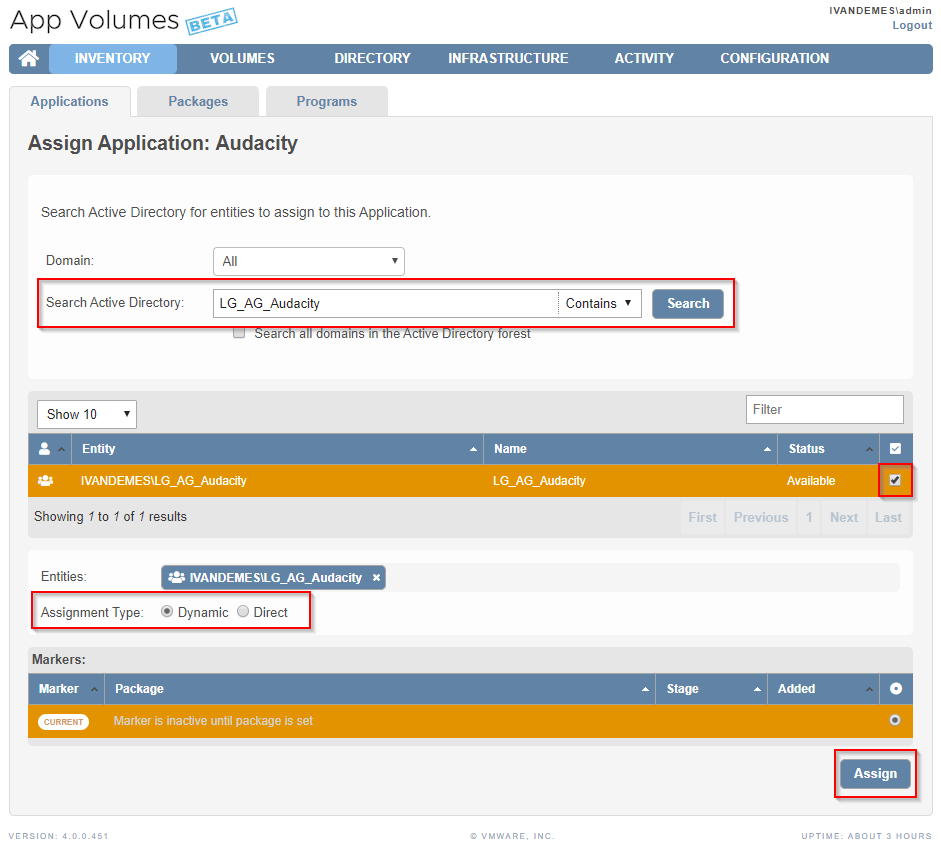
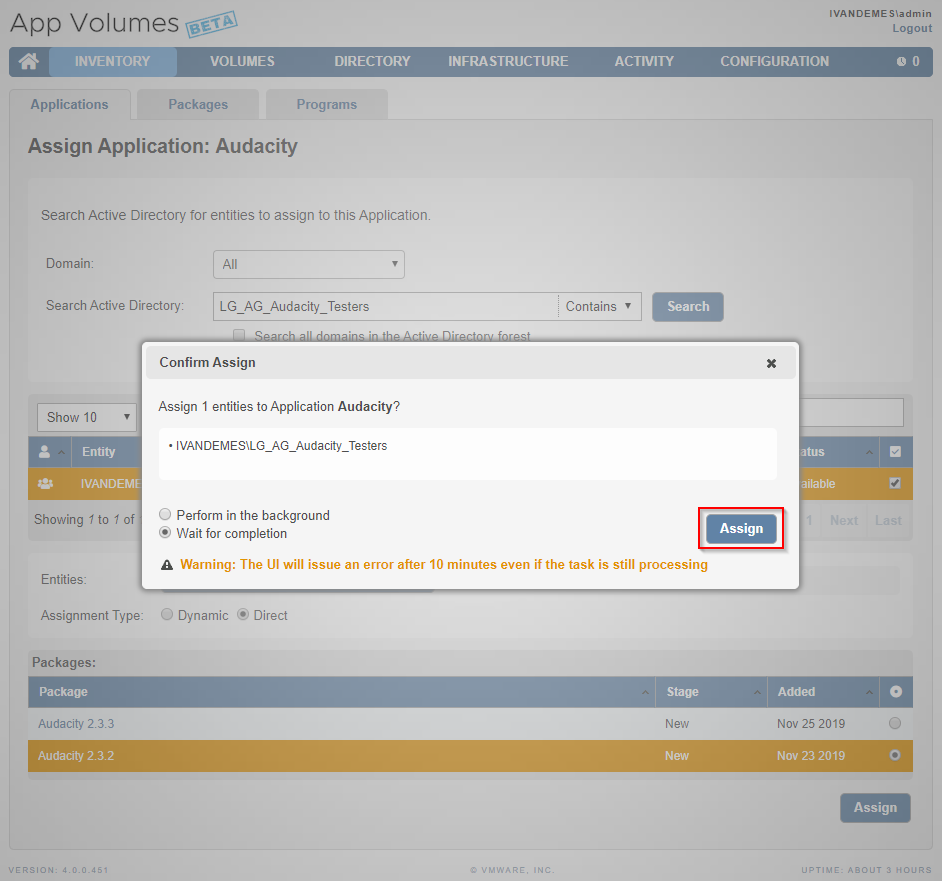
Search for the Active Directory group and select the tick box. Please notice the Assignment Type, which I will come back to in a later step. Click Assign to assign the group to the application.
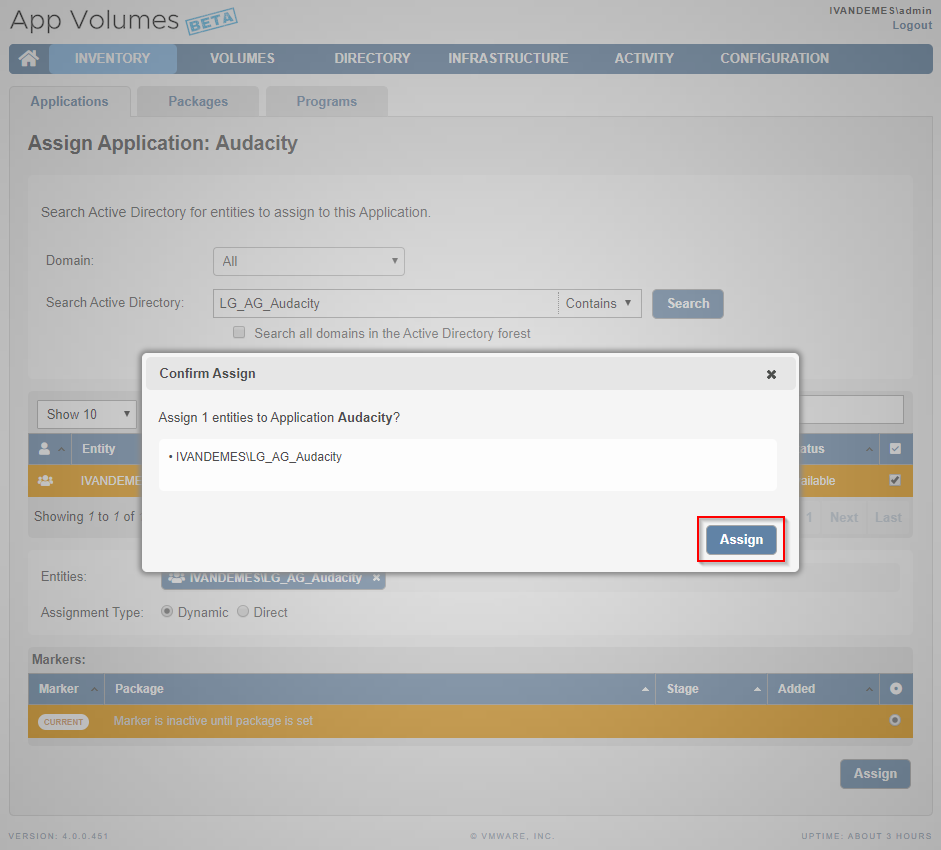
Confirm that you want to assign the Active Directory group to the application by clicking Assign.
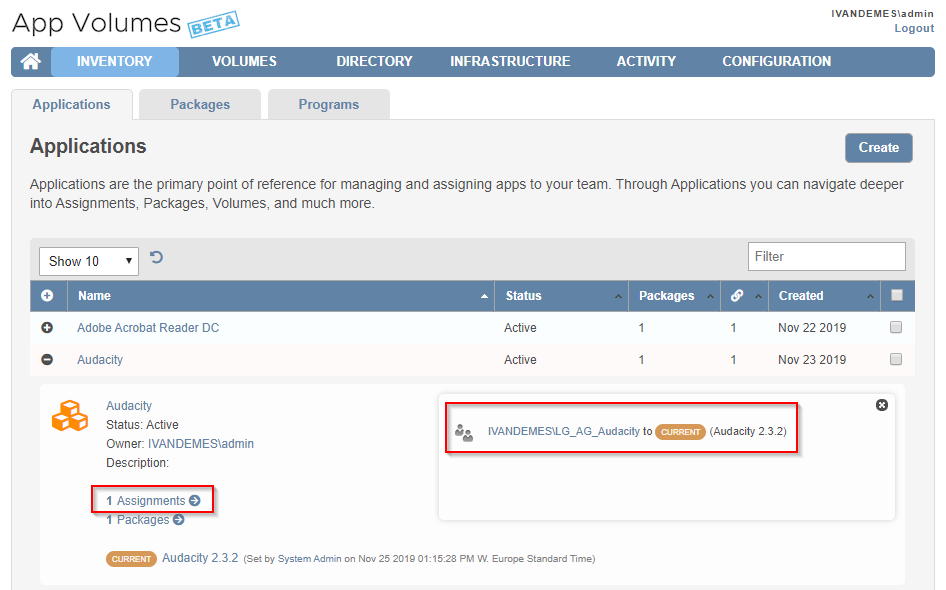
You can now see that the application has one assignment and is linked to the package with the CURRENT marker.
Creating the second Package (newer version of the application)
Fold-out the application using the (+) button.
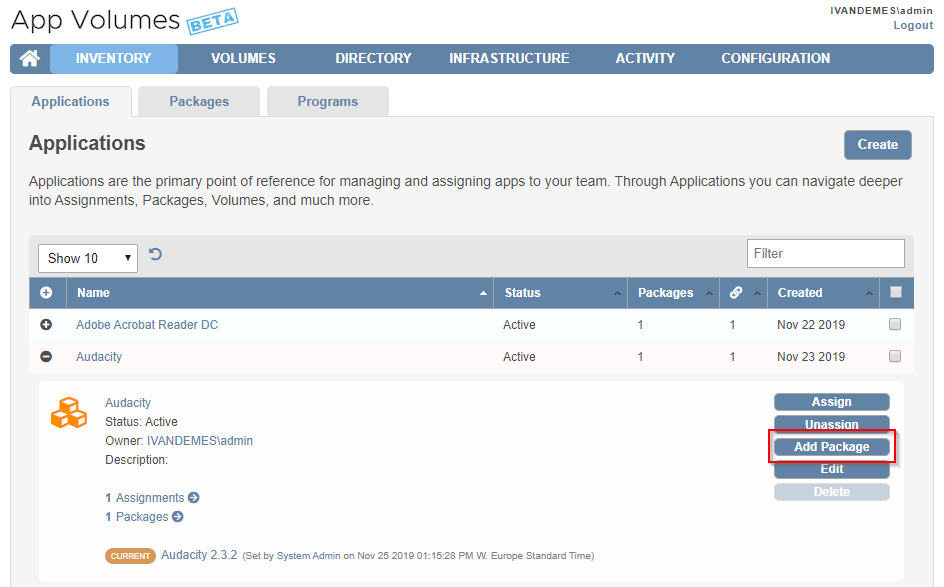
Click Add Package.
Follow the same steps as described in the section Creating the first Package for creating the second Package.
Setting the new Current package
When you now open the application, you will see it has now two packages assigned to the application. One with the CURRENT marker and one without. Even though the application has two packages, only the package with the CURRENT marker is available to the assigned Active Directory group.
To make the new package available to the assigned Active Directory group, click the new package.
Click Set CURRENT.

To confirm that the new package will be made available to the current assignment, click Set CURRENT.
When the user does a re-logon, he/she will have the new version of the application (package) available for use.
Assigning specific Packages to groups
In the previous steps, we configured an assignment where users receive an application based on its CURRENT marker. But if you want to assign a specific version of a package to a different Active Directory group, for instance a testers group, that is also possible.
Fold-out the application using the (+) button and click Assign.

Search for the Active Directory group that represents the testers. Select the group. Select Direct as your Assignment Type. Select the package version that you want to assign the selected Active Directory group to, and click Assign.
Click Assign to confirm the assignment. Users that are part of this assignment will receive the specifically selected package version.
Configuring Stages
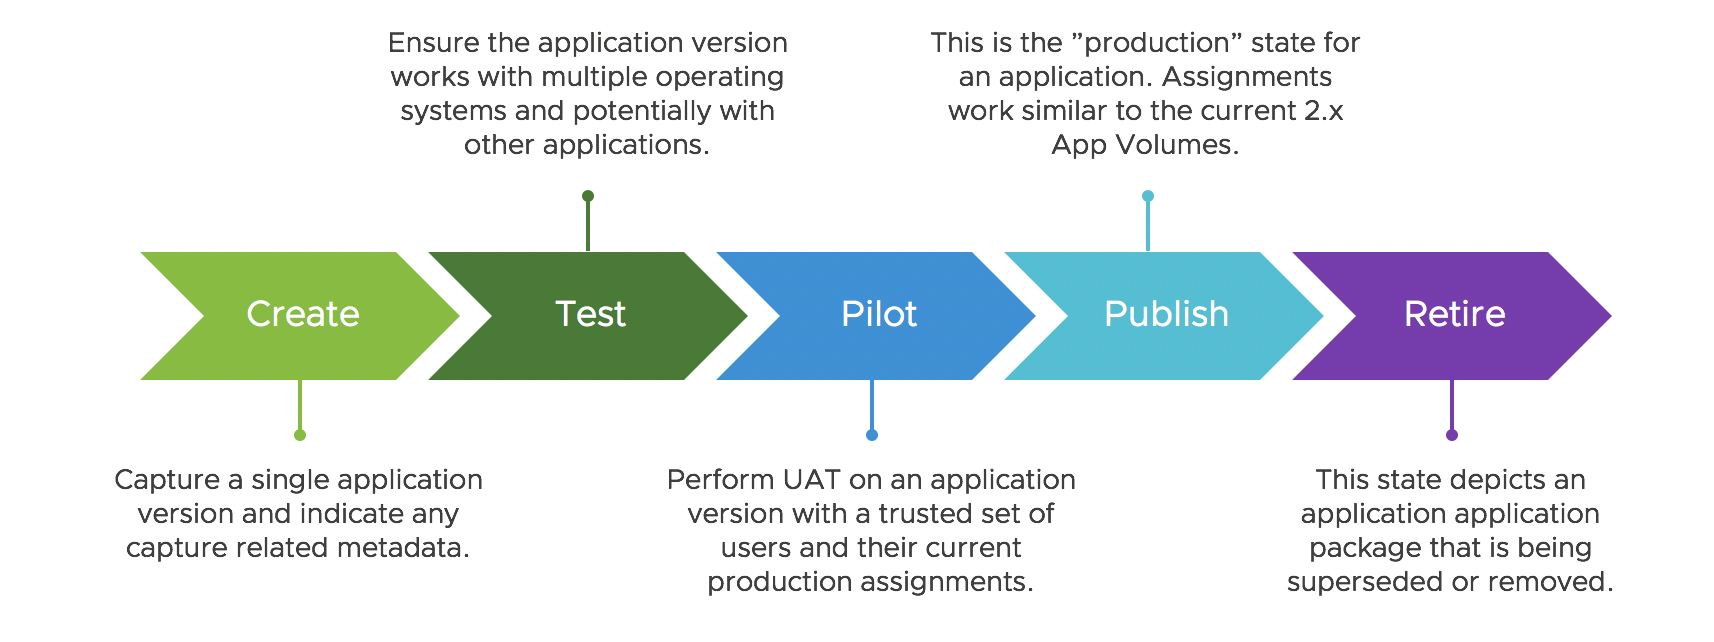
The last thing I want to talk about is Stages. App Volumes 4.0 introduced the use of stages to support the application testing, production, and retirement cycle. You can change the stage of a Package by editing the Package. There are four stages.
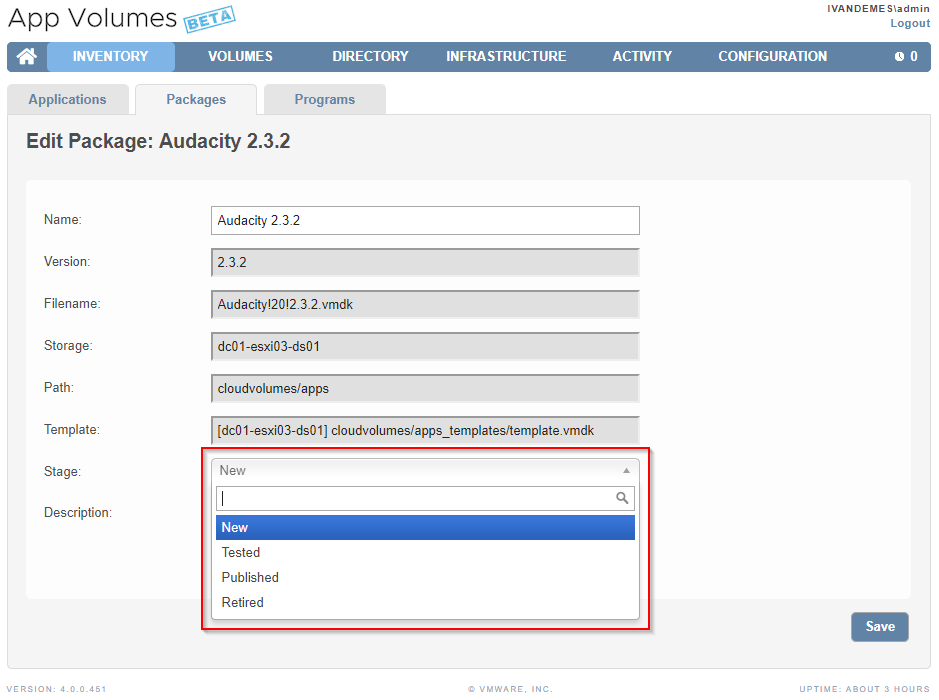
- New (automatically selected when creating a new Package)
- Tested
- Published
- Retired
When I first read about this, I had the idea that it was possible to assign a certain Active Directory group to a certain stage. But it is not. It is actually just an administrative marker to explain in what stage the package is. Nothing fancy behind that 😉 . However, as explained in the section Assigning specific Packages to groups, you are still flexible in assigning specific package versions.
Provisional Conclusion
While having a first look at the App Volumes 4.0 Beta I was pleasantly surprised by changes that are introduced. The idea to move away from AppStacks (even though this concept is still possible with Applications) and have a single application approach, makes packaging, testing and assigning applications more flexible. Especially with the Dynamic and Direct assignment option. The Stages come in handy for administrative purposes, but you have to be disciplined to use and adjust them correctly.
The Management Console interface looks familiar if you are used to the 2.x version. I would have liked the interface to have the Clarity design, but that doesn’t change anything from a functional and technical perspective.
Performance is something that is difficult to talk about at this stage. It is still a beta version and I didn’t implement it in an optimized environment. Preliminary results from a user (logon) perspective look promising though.
I am curious to find out what other (new) features and optimizations the feature builds of App Volumes 4.x will bring.
Next Steps
If you want to put your own hands on App Volumes 4.0 beta, here are some links to get you started.